
Shugei Craft is a craft supply shop that specialises in cute Japanese fabric, sewing supplies, and craft tapes. They were kind enough to offer us some cute fabric for a fun springtime DIY.
The prints are just perfect since we’re smack in the middle of spring, and you can never have too many kawaii lifestyle items! Read on for how to make this kawaii no sew travel pouch with optional bumblebee charm.
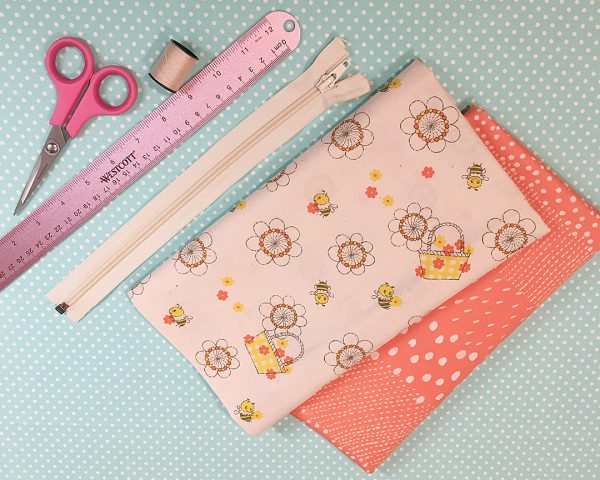
What you’ll need
For the pouch:
- 2 coordinating fabrics (Used: Shinzi Katoh fabric and Kokka fabric from Shugei Craft)
- closed-end zipper (don’t be like me and buy an open-end zipper by accident!)
- scissors
- ruler
- pencil
- pins
- needle/thread or fabric glue
For the bumblebee charm
- yellow & white polymer clay
- black & white paint
- varnish
- pliers & jump ring
Instructions
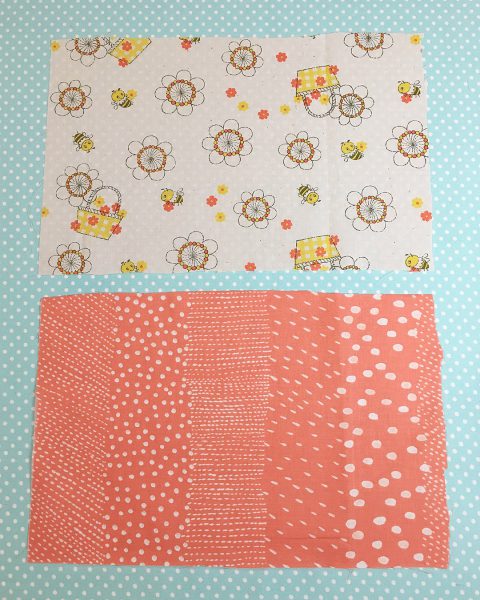
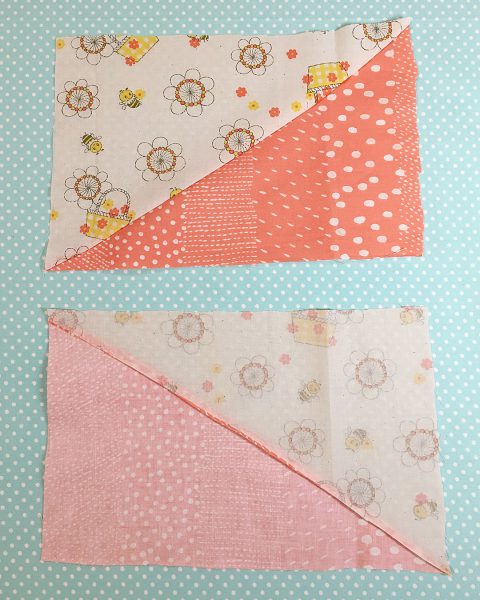
Start by cutting a single piece from each fabric. Cut the length to fit the zipper plus 3cm; cut the height to your desired size plus 4cm allowance. My zipper was 30cm, my pieces were 33cm by 20cm.
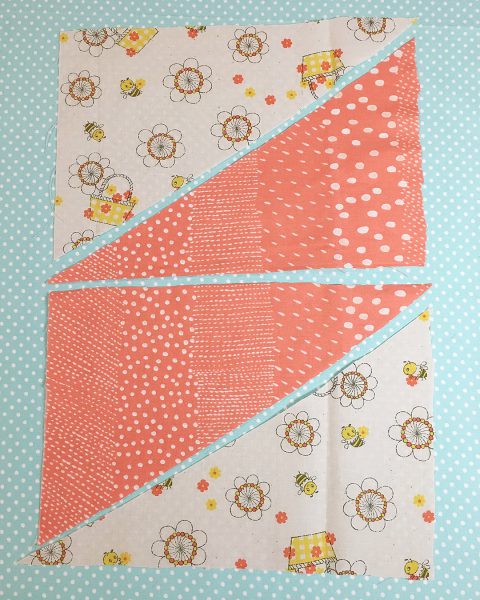
Stack one piece on top of the other, taking care that the wrong side of each fabric is facing up. Pin together. Using the ruler and pencil, trace a straight diagonal line from the bottom left corner to the top right corner. Cut along the drawn line, and you should have 4 mixed pieces that fit together, with two parts for each side of the pouch.
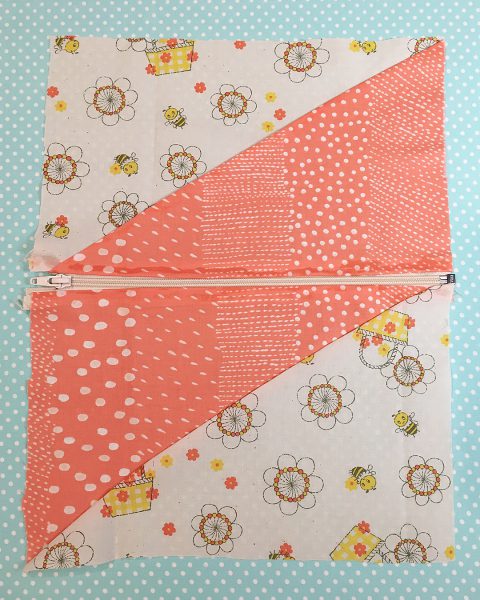
Flip the fabric pieces over so the wrong sides are facing up; focusing on the bottom portions, take the diagonal edge and fold over about ½ cm of fabric. Pin or iron the edge down to make it easier to attach. Once folded, glue or sew the diagonal edges of the top halves of fabric to the bottom halves. Once dry, it should something like this:
Moving on, take your zipper and both sides, and place everything right side up. Make 1.5cm folds at the top edges of each fabric side, then glue or sew them onto each side of the zipper and let dry.
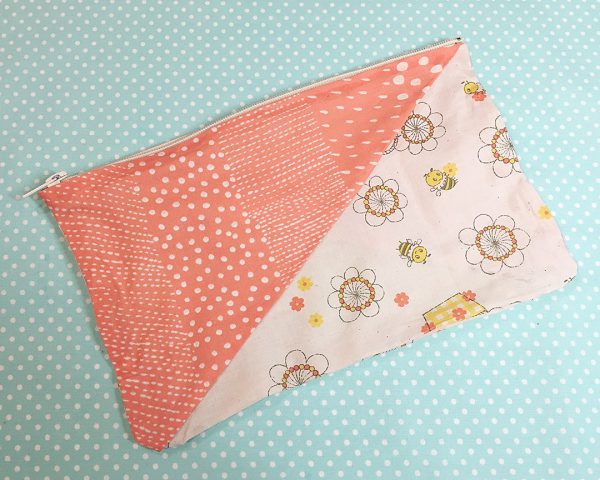
Open up your zipper a little to leave a gap and, with the wrong sides facing up, glue or sew the remaining 3 edges together. Once dry, turn the pouch inside out, and use something like a pencil to poke the edges out.
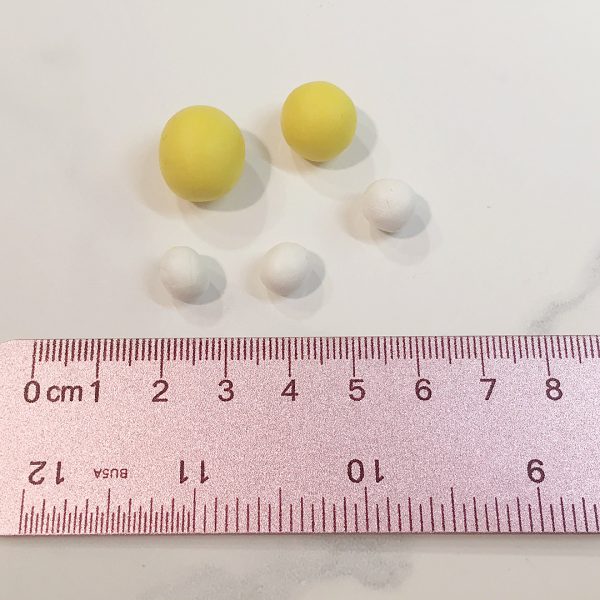
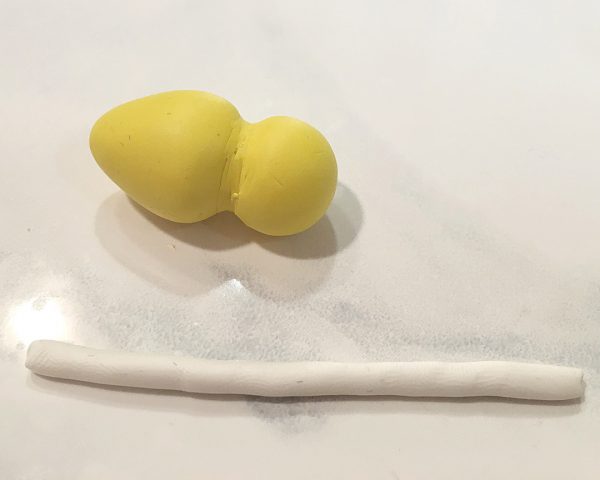
For the zipper pull, we’re going to make something to match the cute little bee featured in the fabric print! Make a 1cm ball and a 1.5cm ball of yellow clay, and 3 ½ cm balls of white clay.
To make the body, take the larger yellow portion and shape it into a rounded tear drop shape. Attach the smaller yellow portion to the wide end, then take a clay tool or your finger and blend them together to secure the piece. It doesn’t have to be perfect since it will be covered with more clay.
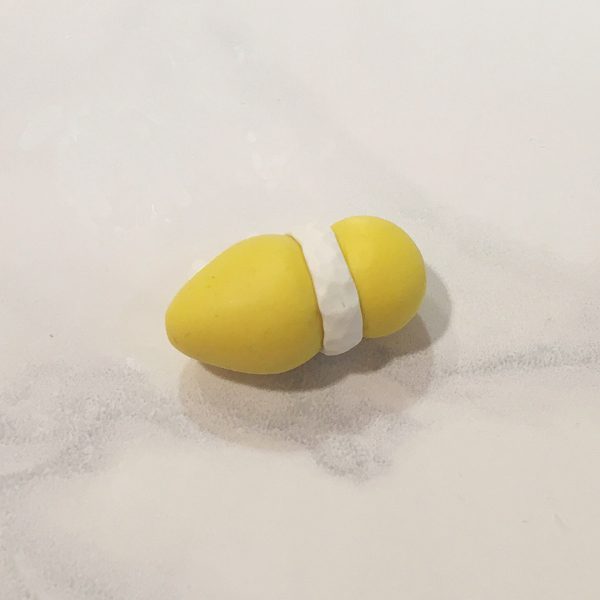
Take one white ball of clay, and roll it into a long enough, and wrap it around the bee’s neck. Cut off the excess, blend, and make the fluffy texture with something like the head of a pin.
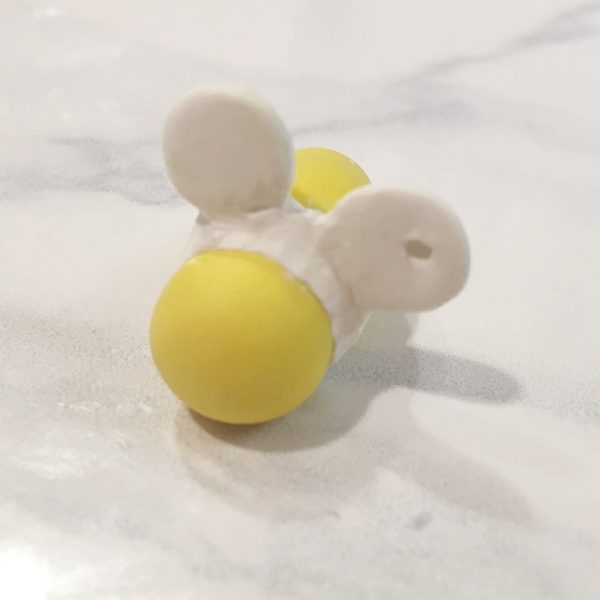
Turn the other two balls into flattened tear drop shapes for the wings. Poke a large enough hole in one wing so you can attach it the zipper, then attach and blend both wings onto the bee.
Bake your bumblebee according to package instructions, and then paint on the stripes and face. I mixed black and white paint to get a dark gray that’s closer to the fabric print. Since it will be handled a lot, I chose to paint the antennae on instead of using bits of clay that could break off (it seems they turned out more like eyebrows though!)
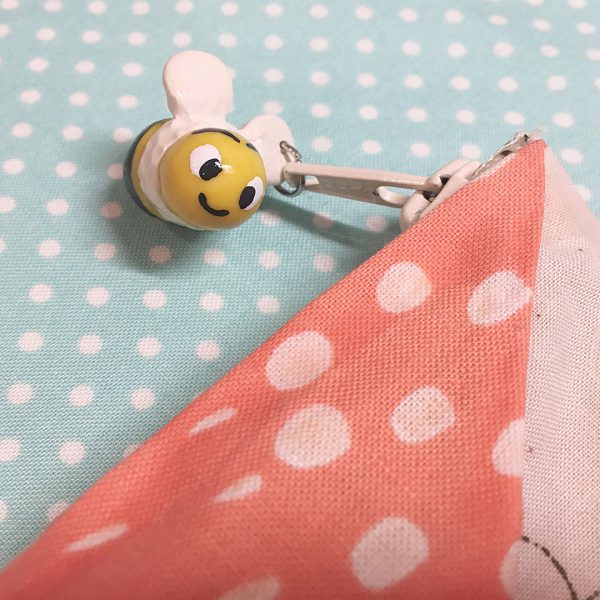
Let the paint dry and apply varnish. Once that’s dry, use pliers to attach the jump ring to the bee and zipper, and you’re done!
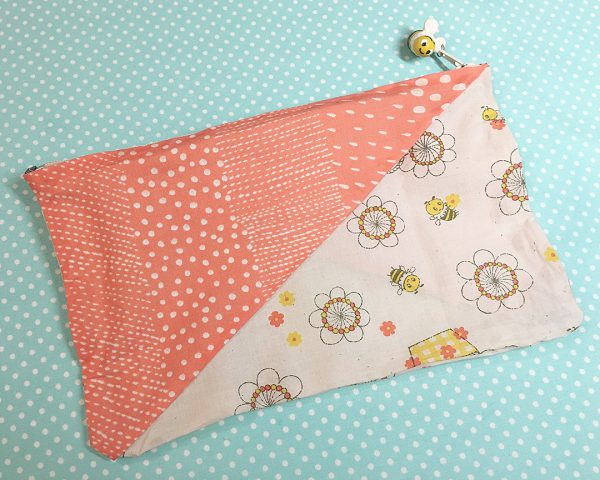
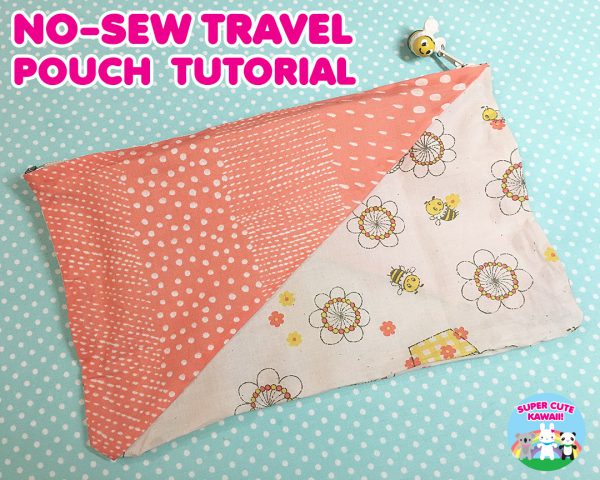
The bag turned out super cute, and I’m happy to have something to take with me on upcoming trips. The fabric is very good quality, so I see it holding up nicely!
If you decide to try this no sew travel pouch, comment below or tag @sckawaii on social media – we’d love to see your creations! You can also check out all of SCK’s original tutorials for more crafty ideas.
This tutorial was created by Andi for Super Cute Kawaii and the images and instructions may not be reposted without credit and permission. Thank you for respecting the rights of artists and makers. Fabric provided by Shugei Craft but all text and photos are my own.


Leave a Reply