
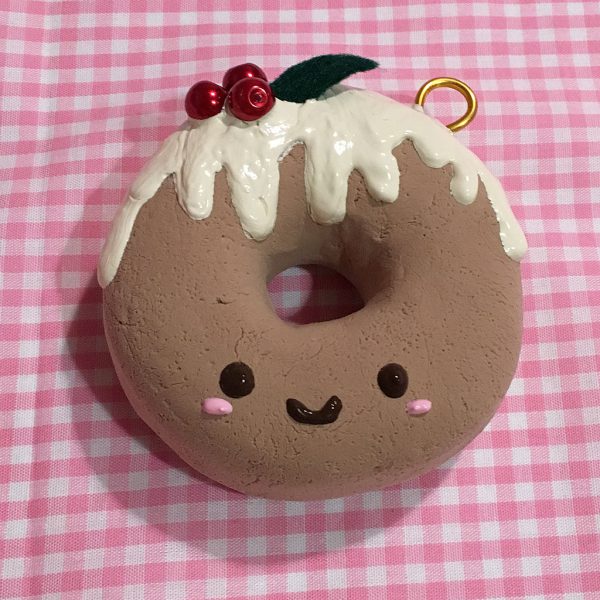
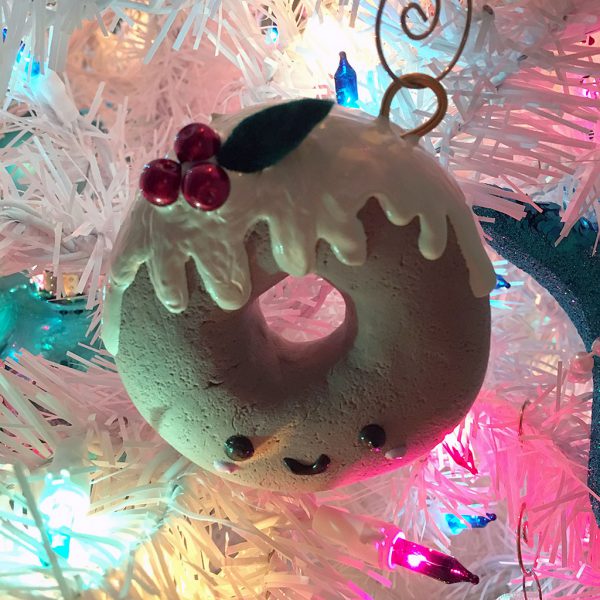
I’m a sucker for food with cute faces, so this week I’ve got a Christmas pudding-inspired donut ornament tutorial.
It takes only 20-30 minutes to make (not including dry time if you’re using air dry clay,) so it’s something you can make even if you’re busy with holiday preparations.
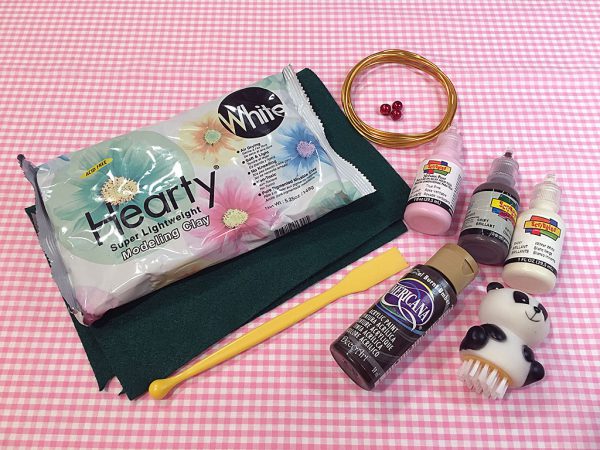
What you’ll need:
- air dry clay + brown acrylic paint OR brown polymer clay
- pink, cream, brown puffy paint
- green felt OR clay (for the leaf)
- red beads
- floral wire + wire cutter (or sharp scissors)
- clay tools
- clay texture tool (I used a nail brush)
Note: Polymer clay would be an acceptable (and faster) alternative for this project, although the finished product will be much heavier, which is why I suggest air dry clay if possible. If using polymer clay, just create your donut, insert your loop, and bake it before applying your decorations.
Instructions
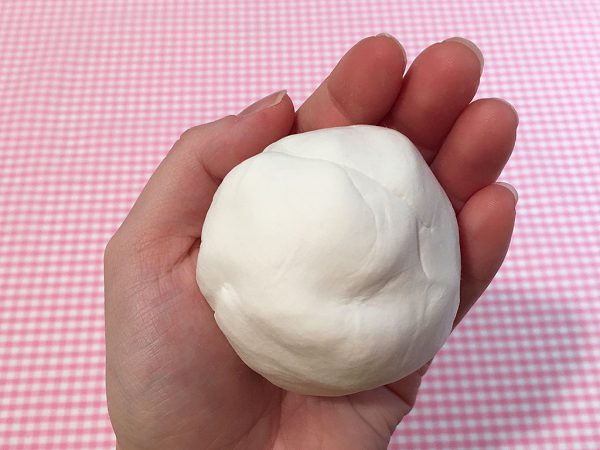
Start off with a small handful of clay. Mine was about 6cm in diameter. If you’re using white air dry clay, you’ll need to color it with brown acrylic paint.
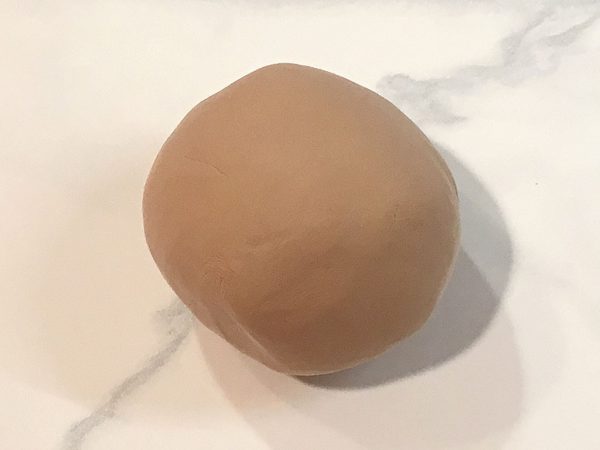
Once you’ve thoroughly mixed the acrylic paint into the clay, shape the clay back into a ball, flatten it until you have a donut shape, and then use your clay tool (or something like the end of a pen) to create a hole in the center.
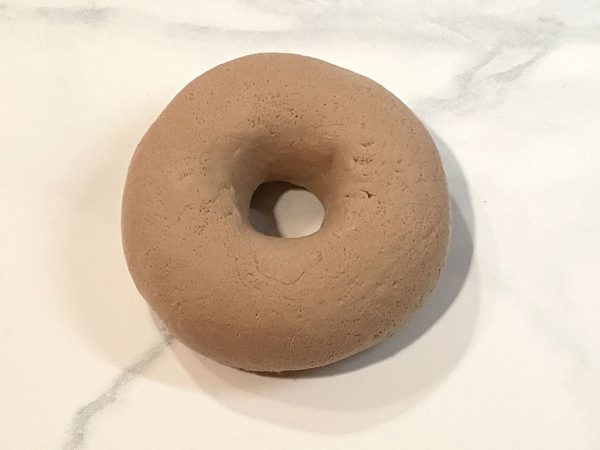
Once you have your basic donut, texture it with your texture tool of choice.

I also used the neck of one of my clay tools to make the center “line” so the donut was a little more realistic.
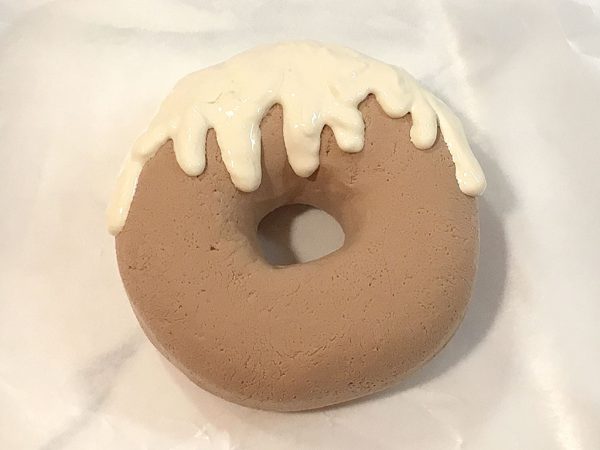
Time for the icing! I used light cream for a basic melty icing design on top and drew the face using brown and pink. Feel free to get creative here, though! I used puffy paints because you get a little more control when applying it, but you can also use regular paint with a paint brush.
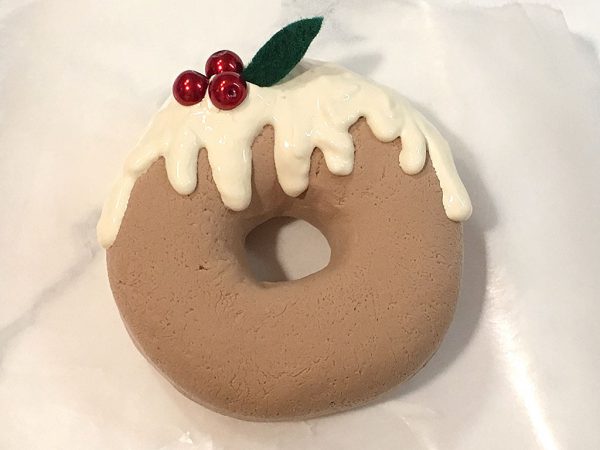
Carefully add your beads and leaf to the icing. I used some red pearls and a freehand leaf cut from some green felt as I enjoy mixed media, but you could also make these from clay as well.
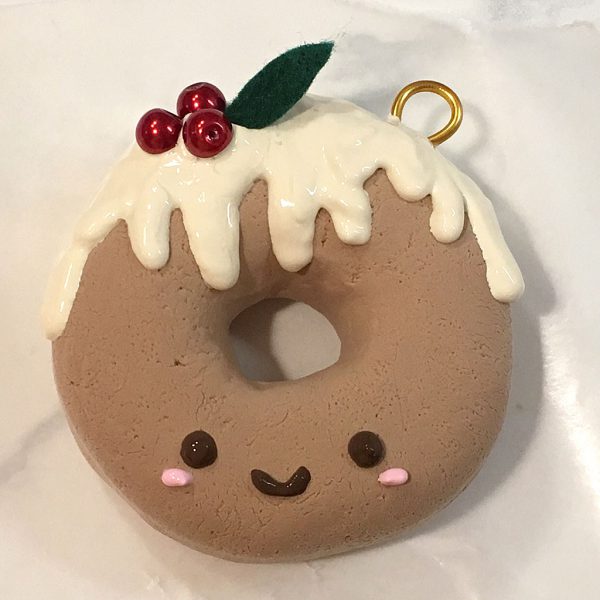
Since it’s an ornament, we need a way to hang it! I cut a 5cm piece of cheap floral wire, made a loop, and twisted the ends together. Once the loop is made, just insert it wherever you see fit. Alternatively, you could do the same with jewelry wire, or just use an eye pin, if you have one large enough to fit a hook or string.
Now comes the hardest part: waiting for it to dry. I recommend 2-3 days to make sure everything has cured completely. Add your hook or string of choice, and you’re done!
If you decide to try this out, comment below or tag @sckawaii on social media – we’d love to see your creations! You can also check out all of SCK’s original tutorials for more crafty ideas.
This tutorial was created by Andi for Super Cute Kawaii and the images and instructions may not be reposted without credit and permission. Thank you for respecting the rights of artists and makers.


Leave a Reply