
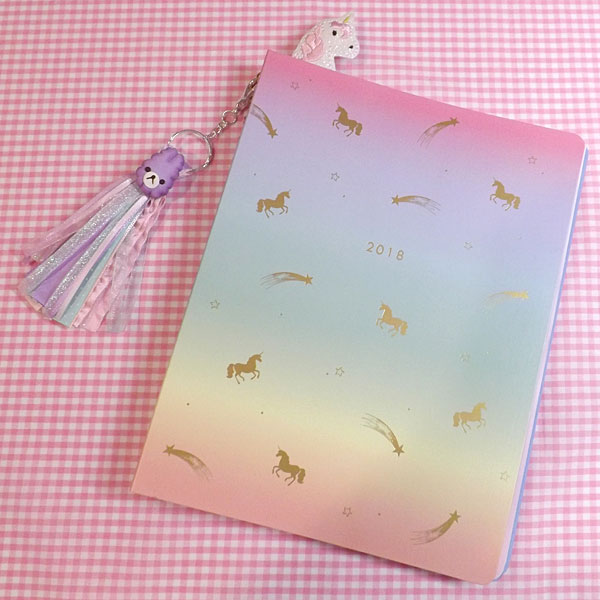
If you’ve got a new planner all set up for the school year (or work), you might want to accessorize it, too! There are lots of ways to do that, but planner charms are arguably the most popular choice.
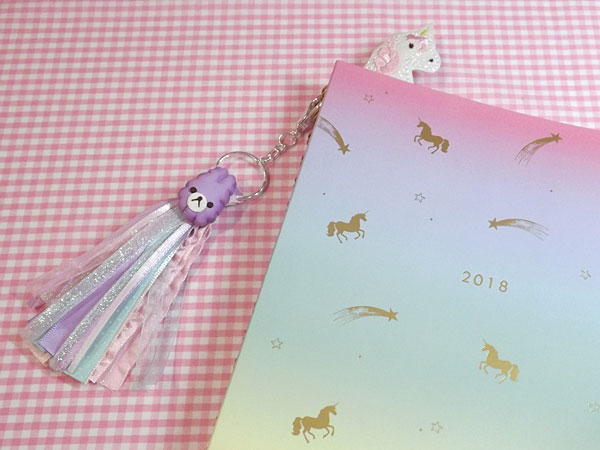
I’ve put together a quick tutorial showing you how to make a basic ribbon tassel charm, as well as a cute clay bunny to add to it!
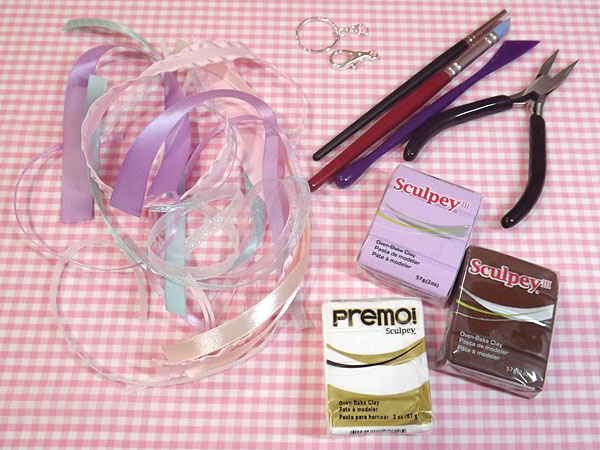
What you’ll need:
- various ribbon – note that the more you use, the fuller your tassel will be.
- key chain ring
- large lobster clasp
- jewelry pliers
- 2.5 cm ball of lavender polymer clay
- 0.5 cm ball of white polymer clay
- a tiny piece of brown polymer clay
- hot glue or fabric glue
- purple and hot pink soft pastels (optional)
- small clear hair elastic (optional)
- silicone sculpting tools (optional)
Instructions
Start by deciding how long you want your tassel to be. Some of my planners are smaller, so I decided that I wanted the final product to be about 5” long. Then, measure out and cut double that length in each ribbon that you want to use. I cut two 10” strips of 9 different ribbons so that the tassel would be fuller. If you don’t have that many, just cut more of each one to substitute.
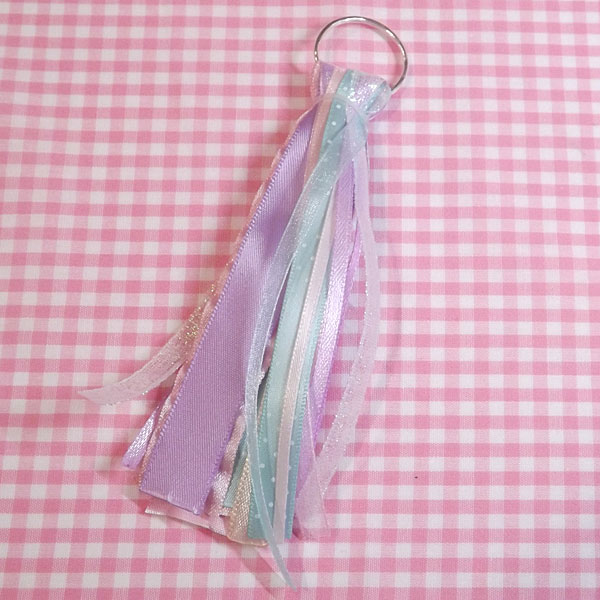
Once all the ribbons are cut, stack them flat and make sure all the ends are flush. Now slip the ribbon through the key ring until there’s equal length on both sides. Take your time to adjust what you need to and hold the ribbon tightly; otherwise you’ll end up with a lopsided tassel!
Now here’s where the hair elastic comes in handy, if you happen to have one: slip it over the key ring and onto the ribbon to hold it in place. This makes it a lot easier to tie off the tassel, but it’s by no means necessary. If you don’t have a hair elastic, lay the ribbon flat, tape the ends and key ring down, and tie string around it.
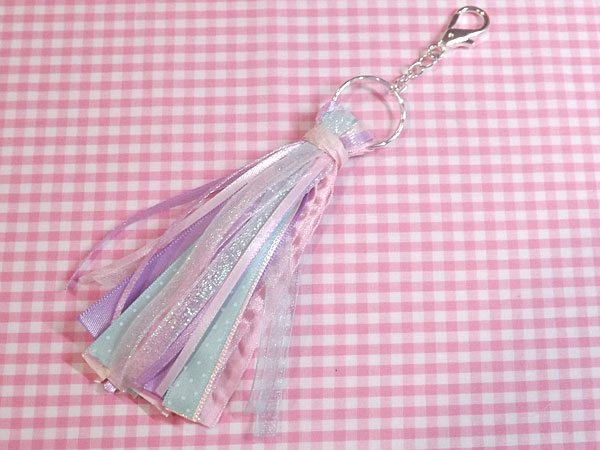
Now choose a ribbon and measure it by wrapping it around the elastic/string a few times. You want to make sure the base is sufficiently covered. Cut the ribbon, and glue one end on top of the elastic/string. Take careful turns to wrap it fully. Place small spots of glue every half-wrap to make sure the ribbon is secure. Once you get to the other end of ribbon, glue it down. Use your pliers to attach the lobster clasp to the chain, and slide the other end of the chain onto the key ring.
Now you could stop here, or glue down something simple like a bow to hide everything. Or you could follow the rest of this tutorial for an additional fluffy bunny!
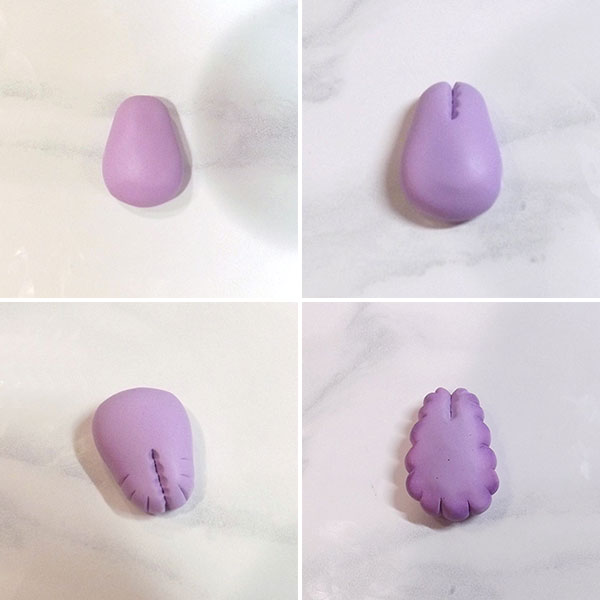
Start by shaping your lavender clay into a pear shape, and flatten it.
Cut a line down the center of the elongated top to separate the ears. Make sure not to cut all the way through to the bottom at this part; you just need to cut about a third or half way through. We want this bunny to look extra fluffy, so use a sculpting tool or something like the end of a paint brush to create a scalloped effect.
Cut lines all along the outer edge from one ear to the other, and shape them until you get the same scalloped look. You can use your hands or something small with a flat edge (like the rounded tip of a credit card) for this part if you don’t have sculpting tools. If you have soft pastels you can use, dab some purple and hot pink along the sides using a cotton bud for a more colorful look.
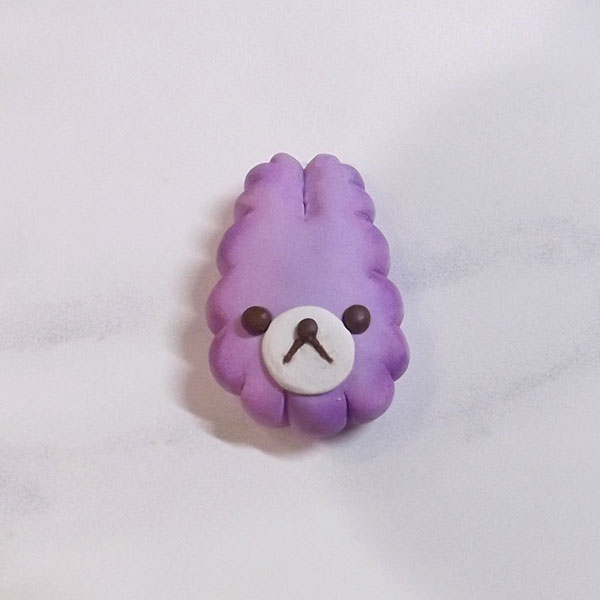
Shape some white clay into a ball and flatten it onto your bunny for the snout. Use a dotting tool or something small with a rounded tip to create the holes for the eyes and nose. From the brown clay, roll out 2 tiny beads for the eyes, and an even tinier bead for the nose. Roll a very thin snake, and cut 2 pieces for the mouth.
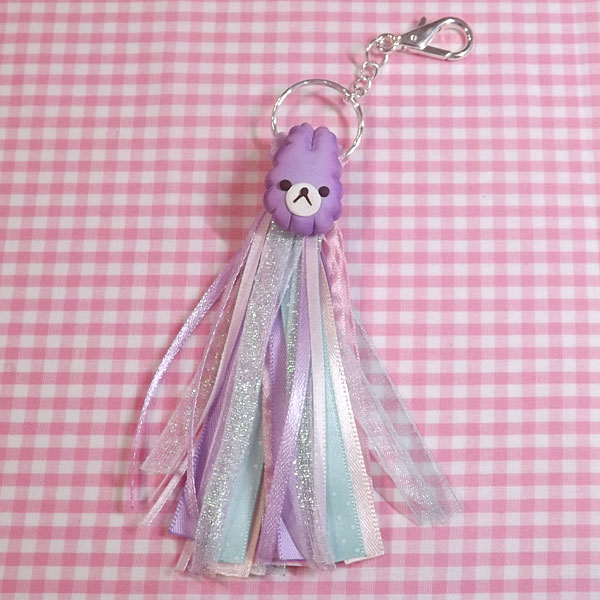
Now bake according to package instructions, seal it with varnish, and glue it on top of the visible glue spot on your tassel. You now have a super cute bunny charm to show off!
If you decide to try this out, comment below or tag @sckawaii on social media – we’d love to see your creations! You can also check out all of SCK’s original tutorials for more crafty ideas.
This tutorial was created by Andi for Super Cute Kawaii and the images and instructions may not be reposted without credit and permission. Thank you for respecting the rights of artists and makers.


Leave a Reply