I finished my dollhouse kit! Here’s a look at everything, plus some cute customisation Ideas and tips that you can try yourself. If you missed the first post in this series, have a look at Getting Started With Dollhouse Miniatures & Kits.
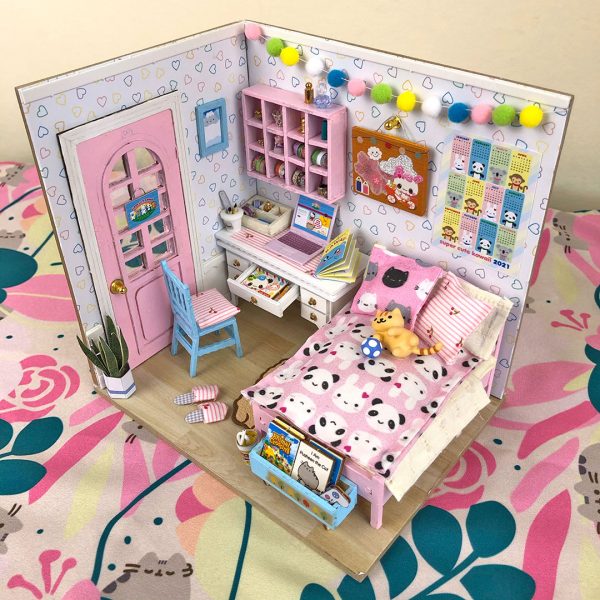
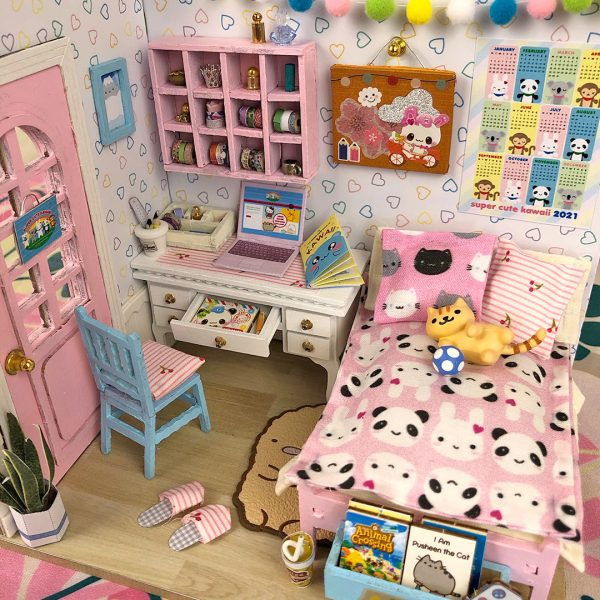
I think the theme of my room ending up being Super Cute Kawaii Bedroom Office. You can almost imagine me sitting there writing this post!
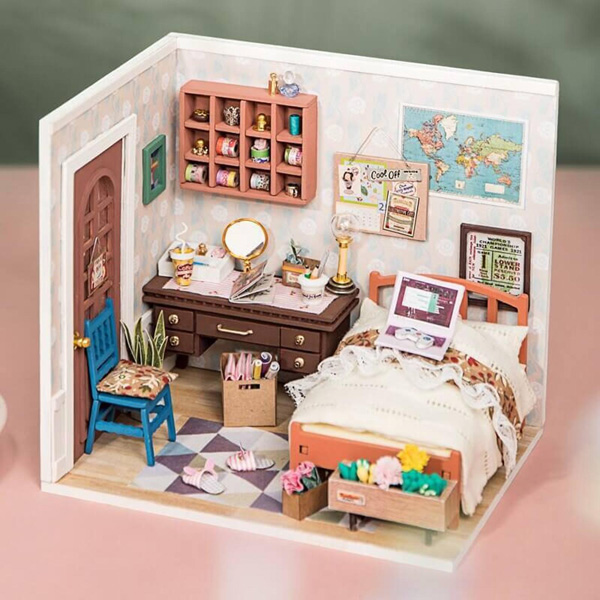
The kit is Anne’s Bedroom by Rolife (available on Ebay & Etsy) and here’s a reminder of what the picture on the box looked like. I ended up changing a lot of things with a more pastel colour scheme and lots of kawaii art, so here’s how I did it…
Changing the paint colours
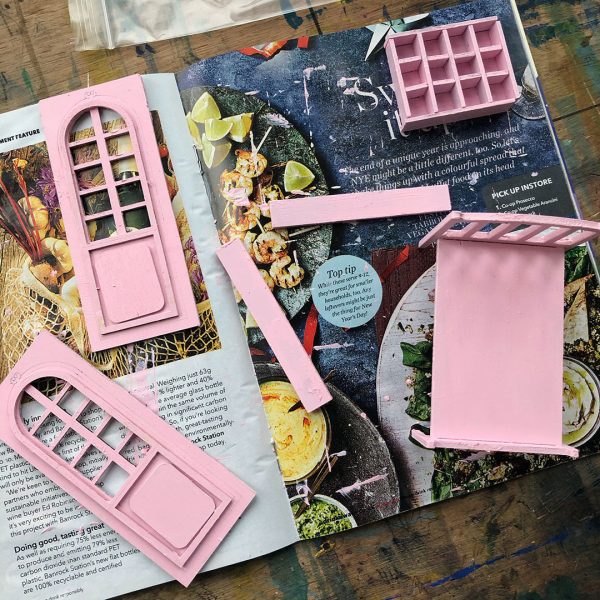
The least kawaii thing about the original kit is all that orangey-brown mis-matched furniture but it’s super easy to change that. I used acrylic paint, which dries quickly and only needs a couple of coats. There was a white paint included in the kit that I used for the desk tidy but it was much thinner and needed 3 or 4 coats. I would recommend spending some time checking exactly how the pieces join up as I wasted a lot of time painting parts that would’t be seen, or that would have been easier to paint once glued together. Luckily the desk was already white so I just didn’t paint it brown as instructed.
Changing the fabric
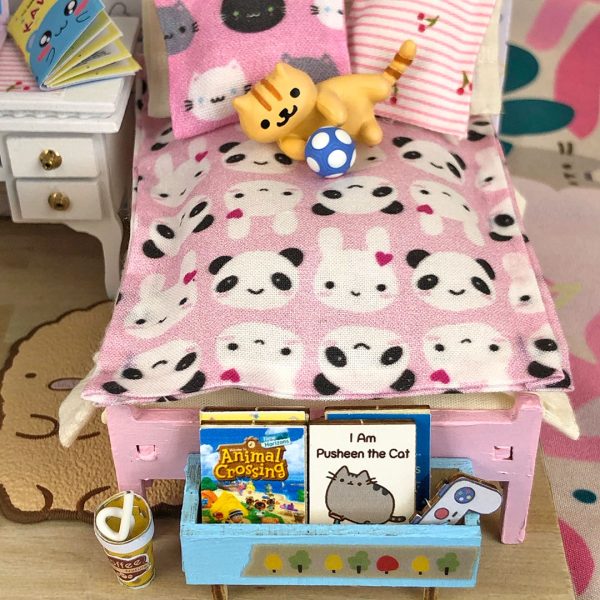
Since I already design fabric patterns, I knew I was going to use one of mine. The cherry fabric included was cute though so I kept that. Finding a print with a small enough scale can be tricky but fabric companies (especially Japanese ones) make small scale prints for doll clothes that will work well. Spoonflower (USA/EU) is an especially good site to try as you can buy a small 8″/20cm swatch for $5/£2, which is plenty for miniatures.
I chose my own Bunny & Panda and Cute Cats fabric, two of the many tiny designs I have available. I decided to make a fluffy comforter and cushions, and then used the plain fabric in the kit for a thinner blanket and long pillow.
Changing the artwork
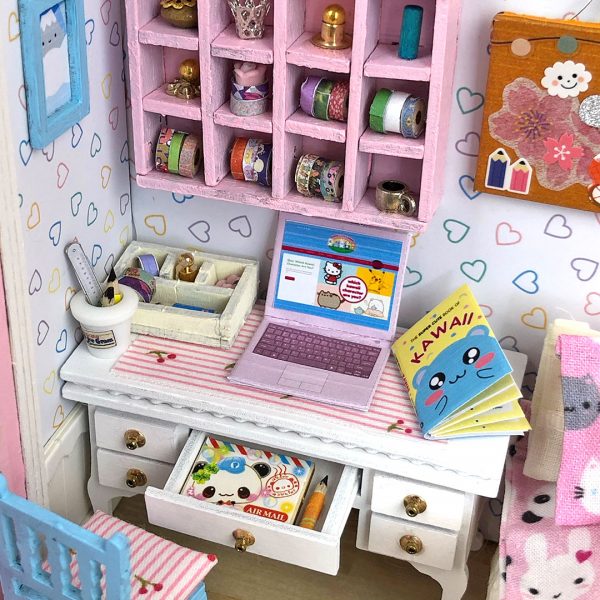
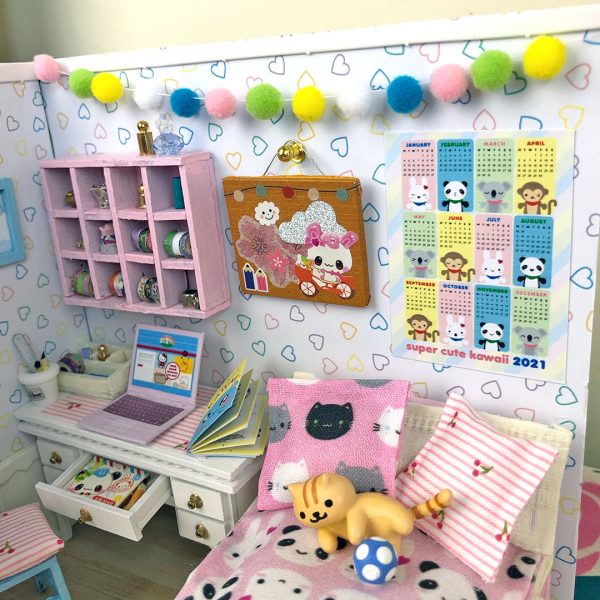
The kit comes with a big sheet of paper printed with all the designs needed for the wallpaper, wall art, magazine, pinboard etc. I changed up just about everything to my own kawaii designs. The laptop has the SCK website on the screen. there’s a copy of The Super Cute Book of Kawaii to flick through, a calendar poster on the wall and a pastel hearts wallpaper.
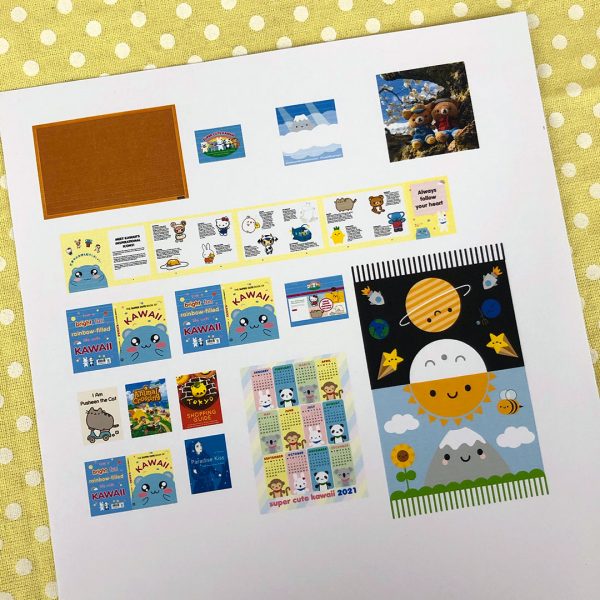
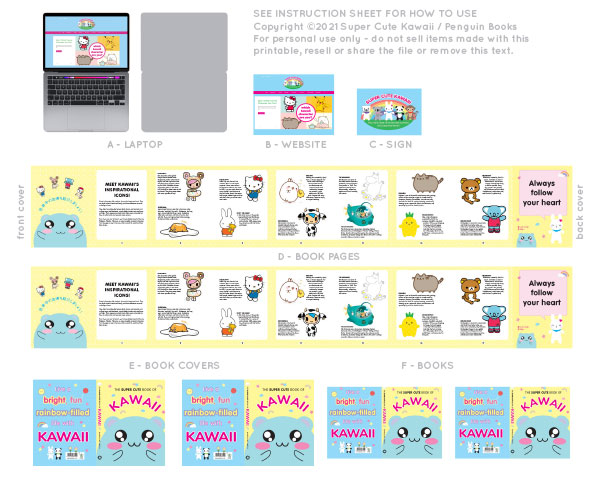
There’s a few different ways you can do this. For most of mine, I measured the included art and then made templates in Photoshop or Illustrator and filled them with my own patterns, screenshots and photos. I then printed them at 100% scale on matte sticker paper so I could stick them straight down without using glue. Check the end of the post for printables to make your own miniature SCK books and art.
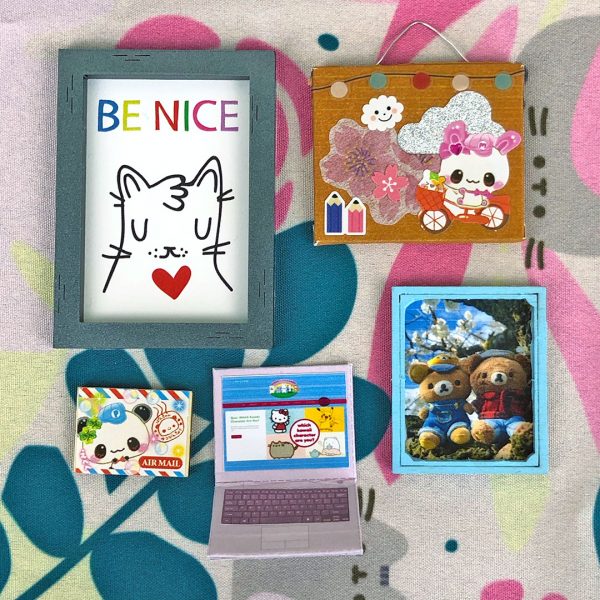
You don’t need to have a printer though. You could make card templates and then draw on them or cut out things from magazines or patterned paper. For the pinboard, I decorated it with stickers for a layered look. And I already owned the tiny gallery kit by I Like Cats (see previous dollhouse post), which is a great size. I just wish there was another wall for more art, rather than overlapping it as the kit suggests.
Reusing materials
You might have noticed that I didn’t make many of the flowers & plants in the kit. I found them impossibly fiddly to cut out (and then fold up and thread on to wire, are you kidding me?) and disliked the texture of the foam clay so instead I turned the planter into a book box!
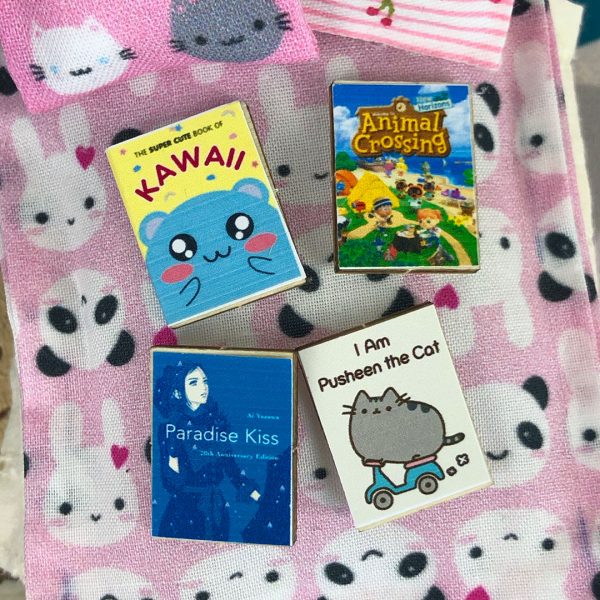
These kits are clearly a bit mix and match and there were a few bits included that weren’t needed in the instructions. I spotted some perfectly book-sized rectangles of wood so I printed off cute book/game covers for them. I also used a leftover piece of the bed’s mattress foam to make a neater cushion for the chair. There were other items I didn’t need or make, like a mirror, lamp and storage boxes, so you could easily adapt some of those pieces for your own hobbies.
DIY decorations
If you enjoy crafting, then there’s plenty opportunities to add your own style. I remembered my box of mini pom poms and joined some together with a needle and thread to make a garland. Please be impressed that I had the same colours as the SCK calendar!
Adding miniatures
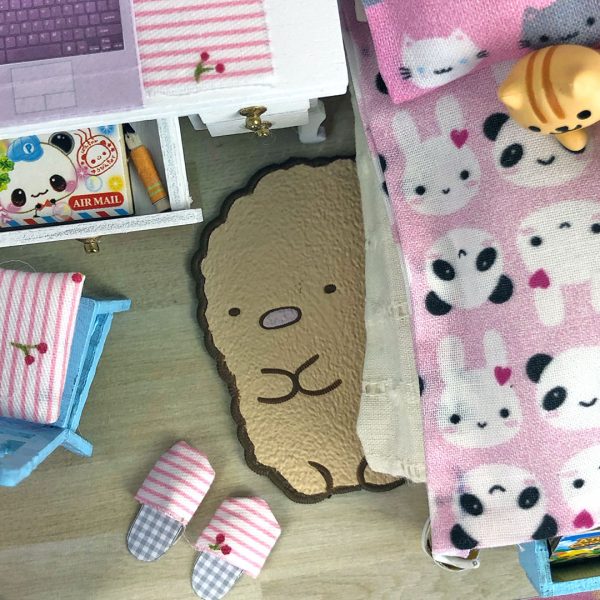
Since I have a type drawer of tiny things and quite a lot of Re-Ment miniatures, I was excited to try out some of my collection. I found most of the Re-Ment was actually too big but this Tonkatsu rug was absolutely perfect. My Neko Atsume gachapon toys were a better size fit and it was tough picking just one cat to use. I’ll definitely be using this as an excuse to buy more Re-Ment though.
General Tips & Thoughts
This was my first dollhouse kit and I mostly found it easy and fun, but also challenging enough that it took me a few weeks to finish everything. Making it more kawaii definitely helped as it was fun to make plans and cool to see my ideas come to life. I did skip a few items that were just way too tedious, and I feel like a lot of it would have been so much easier with printed stickers, like you get with Re-Ment and Lego, instead of cutting out tiny things and gluing them on. I would still recommend these kits but definitely start with a simple one in case you find it all too much. I would like to try a more complicated kit sometime but I already have no idea where I’m going to put this one!
If you have any questions about this kit or how I made something, I’m happy to help – just leave a comment.
Download SCK Printable Miniatures
If you have a dollhouse, or just like making tiny things, I’ve created some printable PDFs with cute artwork you can use. They’re at 1/12 scale but you can print them bigger or smaller (don’t ask me to do the maths!). Download the printable from Ko-Fi (and consider adding a donation to support SCK) with a few options for The Super Cute Book of Kawaii and our website – including the exact sizes to replace items in the kit I made. I also have a bigger paid set that adds character posters, rugs, wallpaper patterns and more. The small charge is to cover my time and protect my artwork. If you use either, please credit me and tag @sckawaii so we can see your pics!
Dollhouse kit was paid for partly by a gift card I received from Etsy but this is not a sponsored post.



Leave a Reply