
We’re super excited to have a guest post from Mollie Johanson of Wild Olive today, with a brand new craft tutorial.
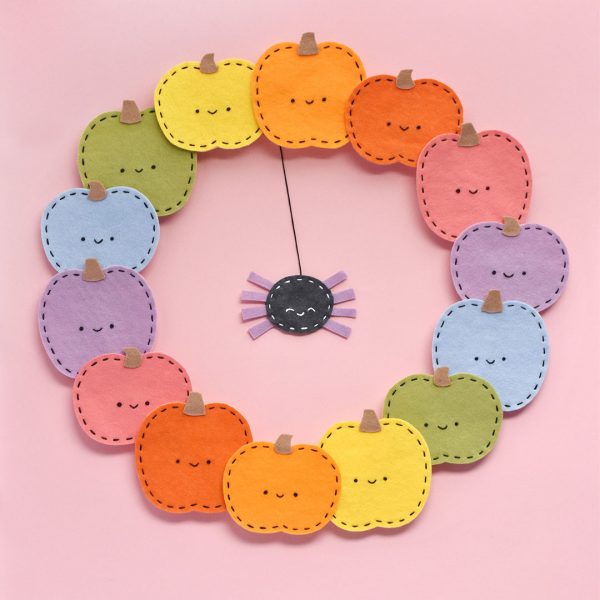
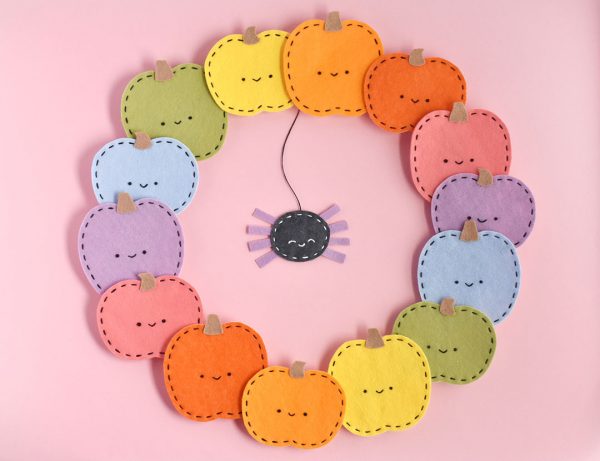
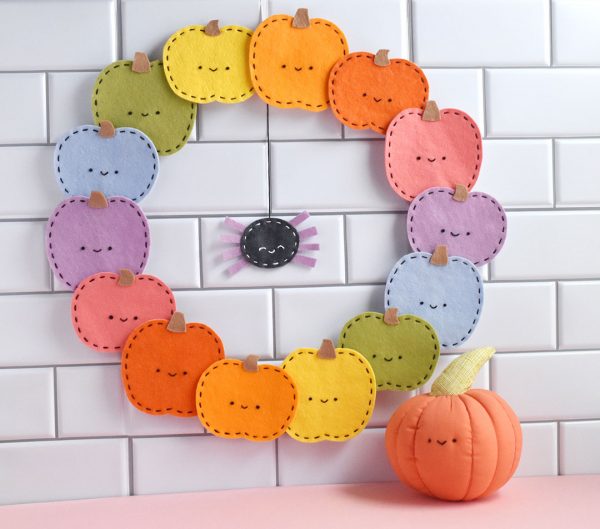
It’s halfway to Halloween and that makes this a perfect time to start some super cute and not-so-spooky crafting! My two favorite ways to make things kawaii cute are 1) make it rainbow and 2) add a face. So for this kawaii pumpkin wreath, we’re doing both! Along with the happy pumpkins, this wreath also has a silly spider friend because, well…Halloween!
The materials for this are mostly basic crafting staples, and you’ll only need to do some simple stitching. It definitely won’t take you until Halloween to make this, but do plan on working on it over the course of a few evenings. Ready to make your own kawaii Halloween decor? Let’s boo this!
What You’ll Need
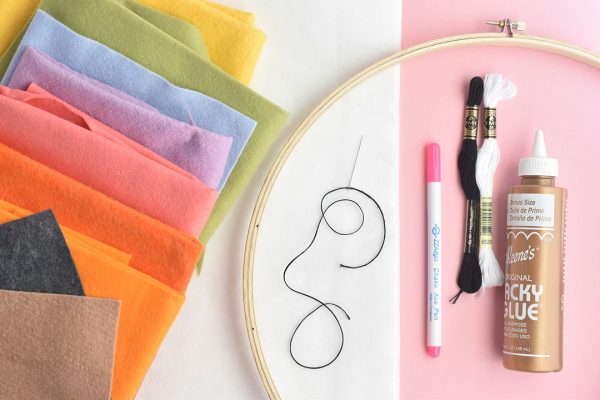
- Felt in a rainbow of kawaii colors, plus a bit of tan and black
- Thick fabric stabilizer (see note below)
- Black and white embroidery thread
- 14-inch / 36cm wooden embroidery hoop
- Pen or pencil
- Craft glue
- Scissors
- Needle
- Printable template – download from Ko-Fi (and consider a donation to support SCK)
Note: For this project, I used a stiff sew-in stabilizer, but you can stiffen the felt with other methods if you’d prefer, or skip it altogether.
Instructions
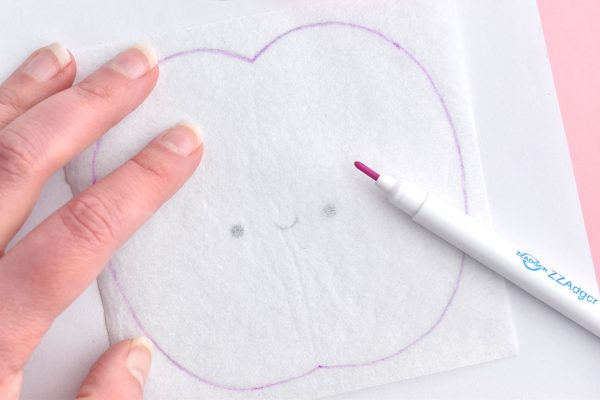
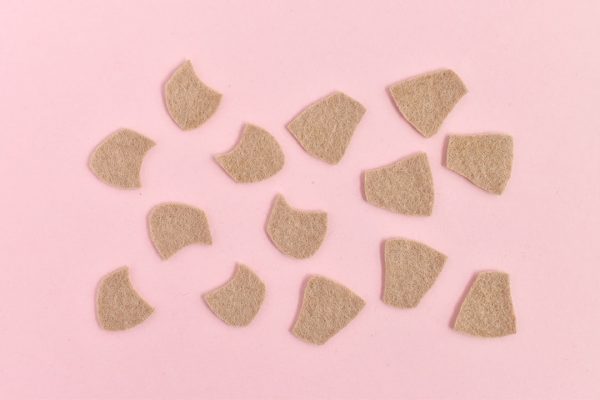
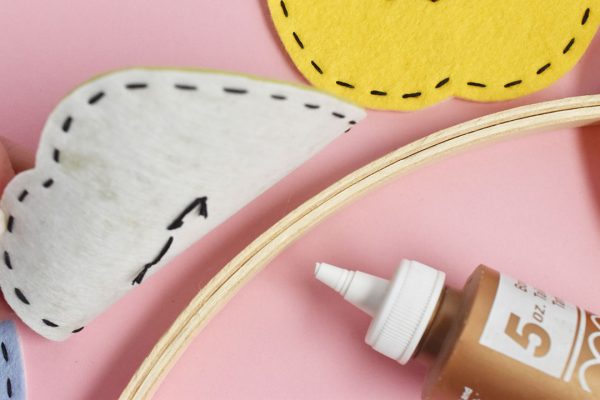
Download the template PDF and print a copy. Trace the pumpkin templates onto the stabilizer. For the wreath I made, I made a total of 14 pumpkins.
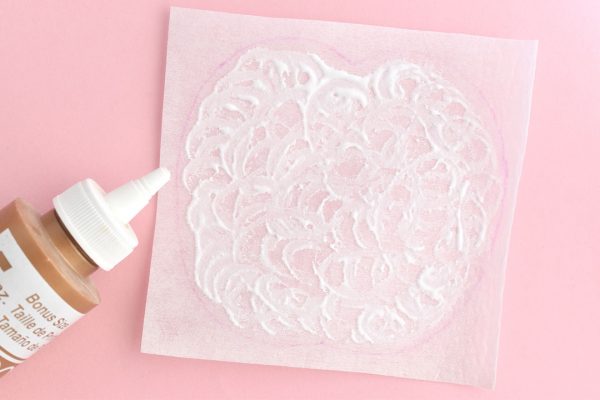
On the back of the marked stabilizer, spread a thin, even layer of glue inside the pumpkin shape.
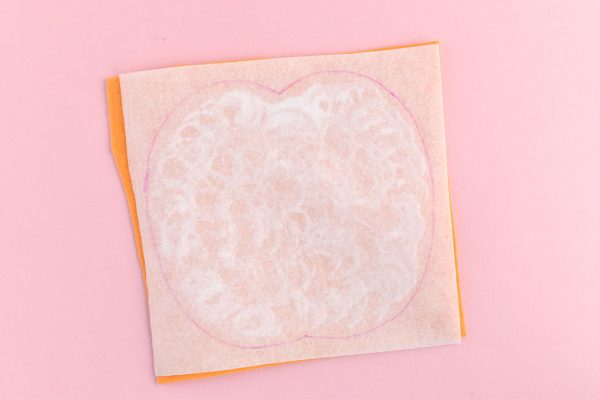
Press the glue down onto a piece of felt. Repeat for all the pumpkins.
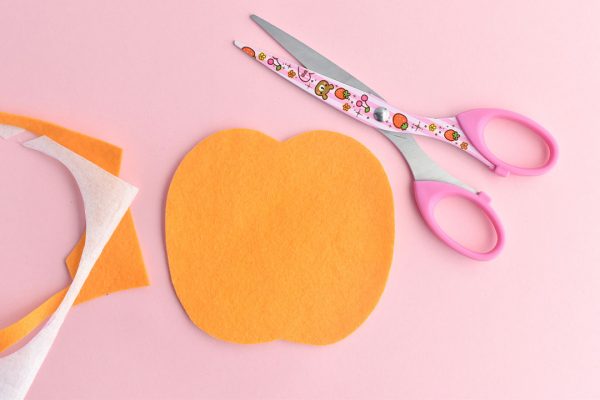
Cut out the pumpkin shapes. Be sure to use your most kawaii pair of scissors! (or a pair that cuts felt really well…)
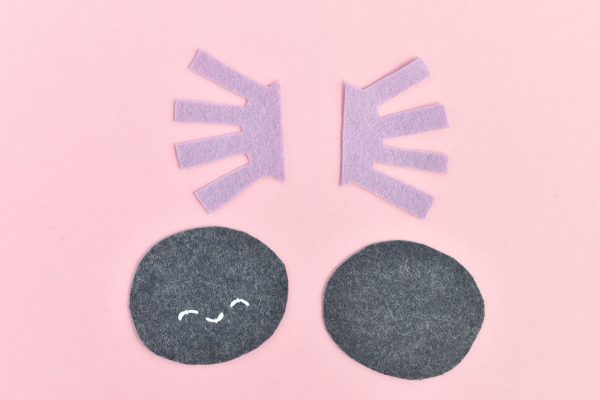
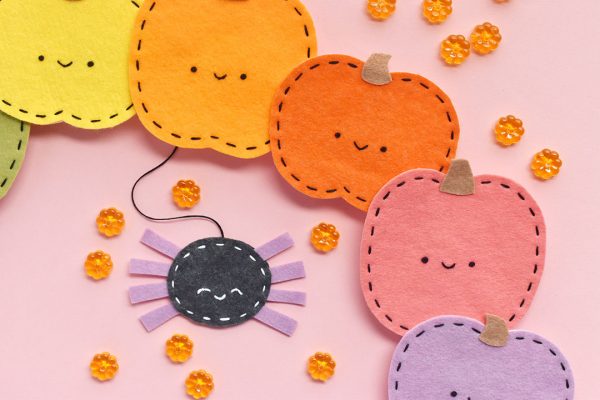
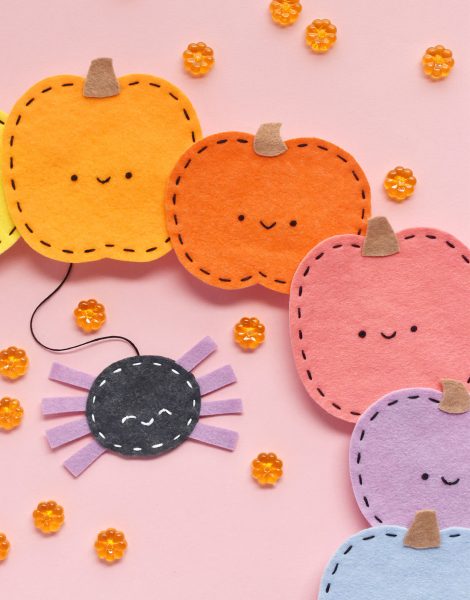
While the glue is drying on the pumpkins, start making the spider for the center of the wreath. Cut out two of each of the spider pieces. Embroider the face on one of the spider body pieces using white embroidery thread and scallop stitch.
You can see how I embroider kawaii faces in this video.
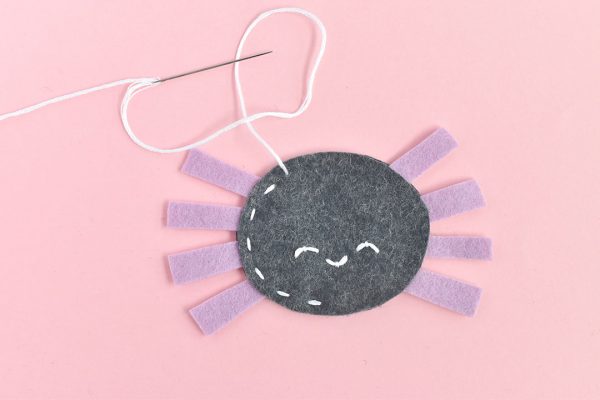
Sandwich the leg pieces between the body pieces and stitch around the edge with running stitch.
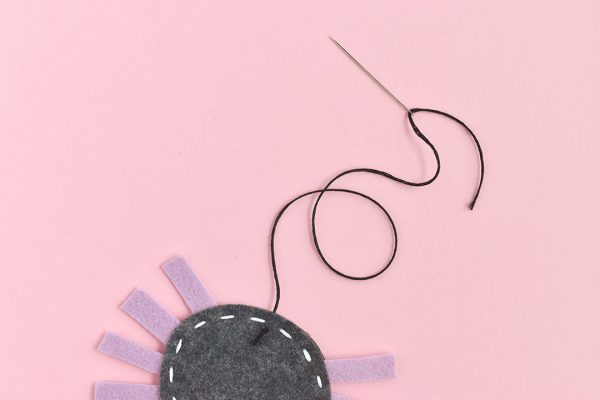
Next, cut a piece of black embroidery thread that is about 10 inches / 26 cm long. Tie a knot in one end and thread the needle with the other. Come up through the back of the spider.
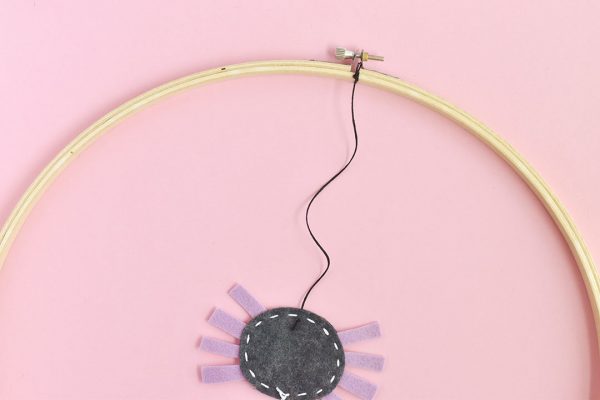
Remove the needle and tie the thread to the top of the embroidery hoop. Make sure the spider is centered in the hoop.
Oh! You’ll also need to cut out a stem for each pumpkin, so you can also do that while the glue is drying.
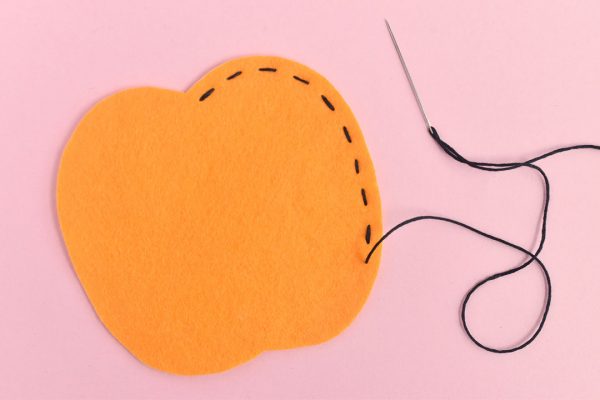
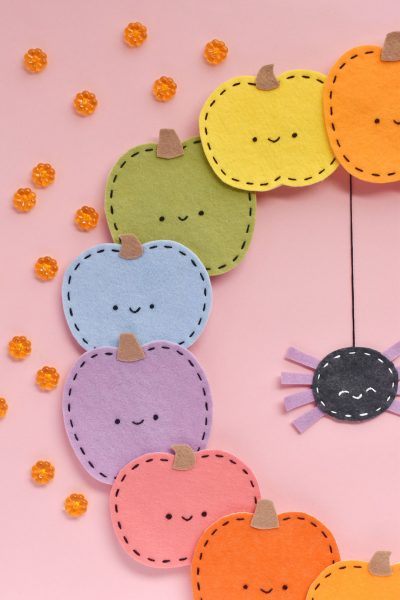
Once the pumpkins are all dry, stitch around each pumpkin shape with black embroidery thread and running stitch. While this does ensure that the stabilizer doesn’t go anywhere, it’s really all about the cute factor.
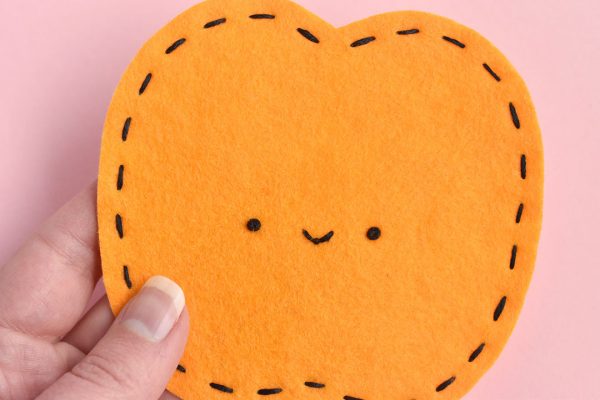
Embroider the kawaii faces on the pumpkins with French knots and scallop stitch. You can trace where the face should go before stitching, or freehand it. If embroidery isn’t your thing, you can also paint the little faces on with acrylic paint and a tiny paintbrush!
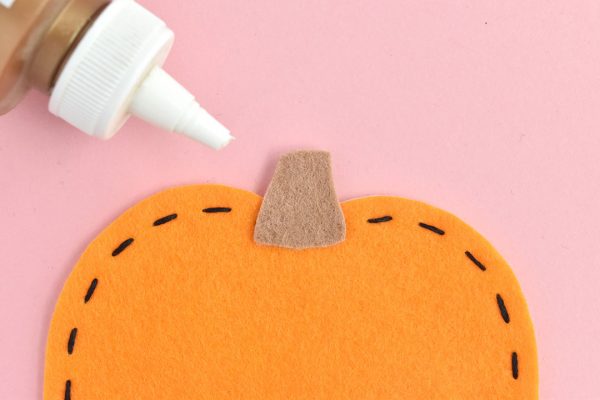
Glue the stems to the tops of the pumpkins.
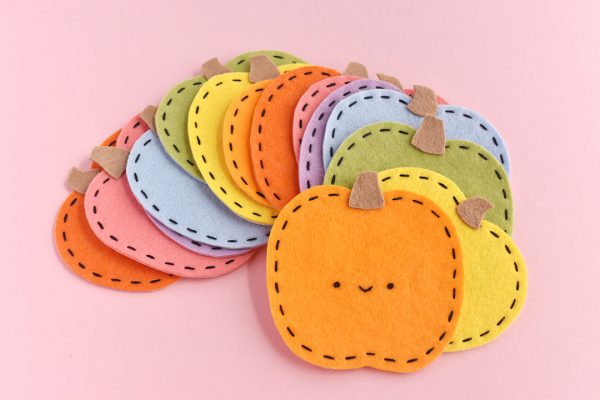
Once all the pumpkins are finished, arrange them in rainbow order alternating the two pumpkin shapes.
Before you attach the pumpkins to the embroidery hoop, it helps to arrange them on the hoop to get a sense of how they need to be spaced out or overlapped. Once you’ve done this, remove just a few pumpkins at a time as you start the next step.
Glue the pumpkins down onto the embroidery hoop. You shouldn’t need to glue the pumpkins to each other, so only place the glue on the wooden hoop. Work your way around the hoop, making sure that you can see all of the kawaii faces!
Once the glue is dry you can hang your wreath up and enjoy! You may want to wait until it’s a little closer to Halloween, but with these sweet smiling pumpkins, no one would blame you for wanting to get the not-so-spooky celebrations started early.
Speaking of smiling faces, I made my wreath with all the pumpkins having the same expression. But if you’re feeling adventurous with your embroidery, you can try other expressions too. For example, you can make smiling eyes like the spider has, turn the smile into a frown, make squinting sideways V eyes, and more!
Of course, even though this wreath is a rainbow, you can make yours however you like. Choose just a few kawaii colors like orange, pink, and aqua, or make all of the pumpkins in different shades of orange!
Happy Halfway to Halloween! If you make a wreath, we’d love to see – tag @sckawaii and @molliejohanson on Instagram

Mollie Johanson has loved creating and crafting cute things for as long as she can remember. She is the author of the Cross Stitch Celebrations: Bundle of Joy! (preorder now for US/UK), Stitch Love: Sweet Creatures Big & Small, and a regular contributor to stitching and sewing magazines. Mollie lives near Chicago and is happiest with a cup of coffee, some (super cute!) stitching, and her family close at hand. Visit her at molliejohanson.com.
This tutorial and template was created by Mollie Johanson for Super Cute Kawaii and the images, instructions and files may not be reposted without credit and permission. Thank you for respecting the rights of artists and makers.


Leave a Reply