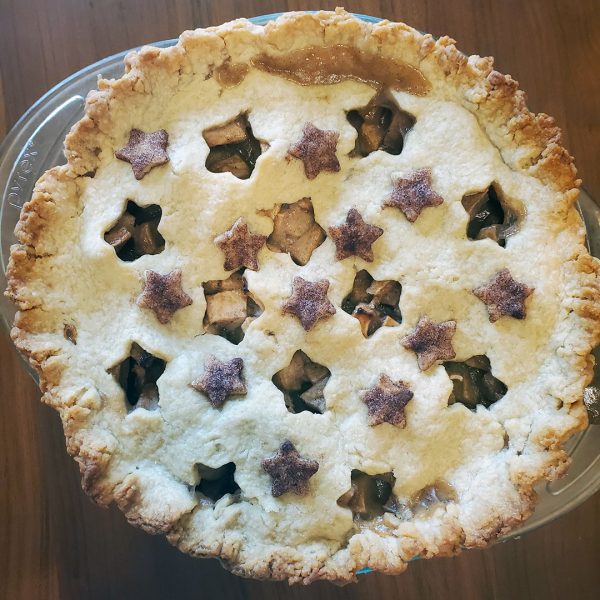
Traditional American apple pie has a lattice (crisscross) top-crust. While that is a lovely effect, I wanted to make mine a little more kawaii. It is simple for you to cute-ify your pie too! You just need a double pie crust (one for the bottom and one for the top), apple pie filling, a pie plate, and a small cookie cutter. I love stars (my name is Nova, after all) and so I chose a small star cookie cutter.
Apple Pie Recipes
There are maybe a billion apple pie variations, but I like this Classic Apple Pie recipe from Martha Stewart. I use this Betty Crocker recipe for all my pie crust needs. Adventures of an Urban Foodie provides a veganized recipe.
Let’s not forget our dear friend, The Supermarket. I like to make pie crust, but I’ve been doing it since I was 8 years old. For others, it is the bane of their existence. That is OK! It is easy to find frozen pie crust and canned pie filling at the supermarket and it will still look and taste homemade (and your house will smell amazing).
Method
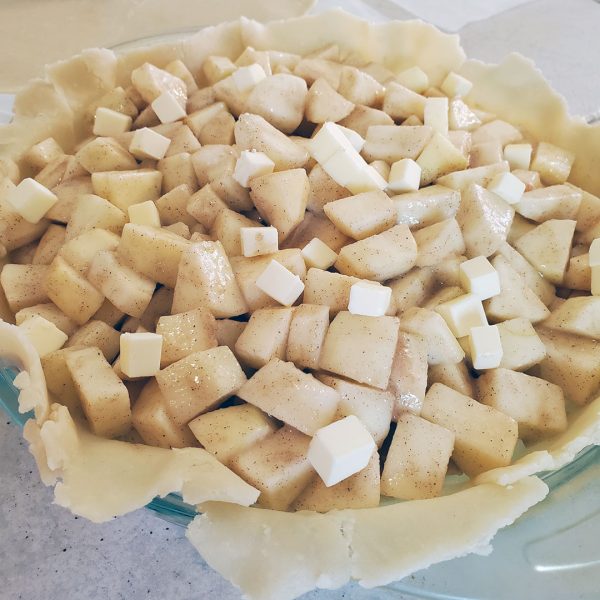
Roll out your bottom crust large enough to cover the bottom of your pie plate. Pour in your pie filling. Roll out your top crust large enough to cover your pie and drape down the sides a bit.
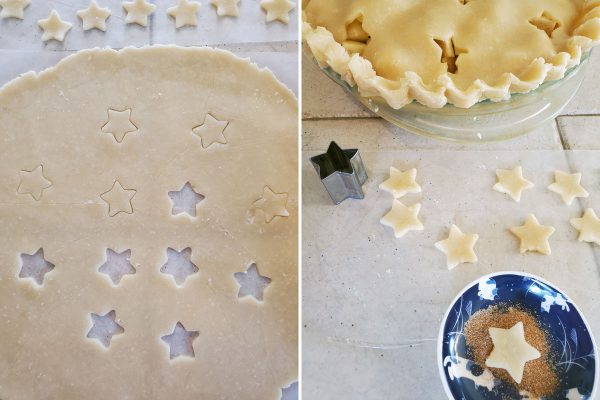
Use your small cookie cutter and let your creativity flow! Don’t throw away the little shapes you cut out. They are a very pretty decoration to add in addition to the fun-shaped holes. They can also cover imperfections and rips.
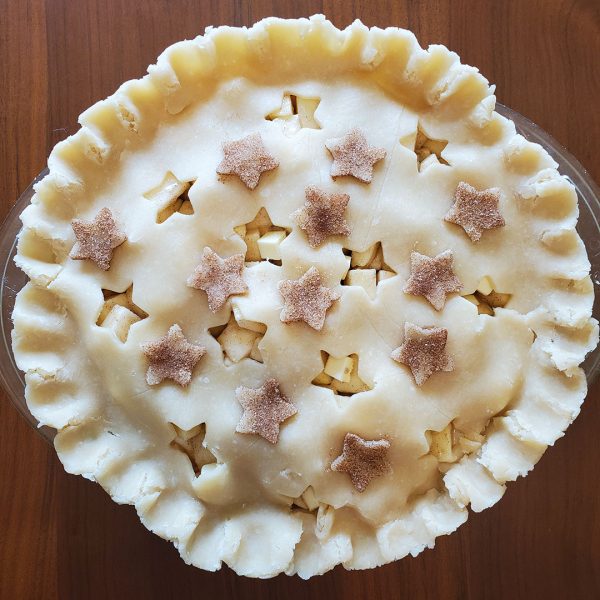
I dipped my stars in some cinnamon sugar I have on hand for my toast. It created a very pretty and tasty effect.
Bonus Pie Tips
Apple tip – Peeling and coring apples is the most tedious part of this pie. Many grocery stores sell peeled apple slices in the fruit section for snacks. You can save time by purchased a couple of bags. It is more expensive, but never underestimate the value of your time.
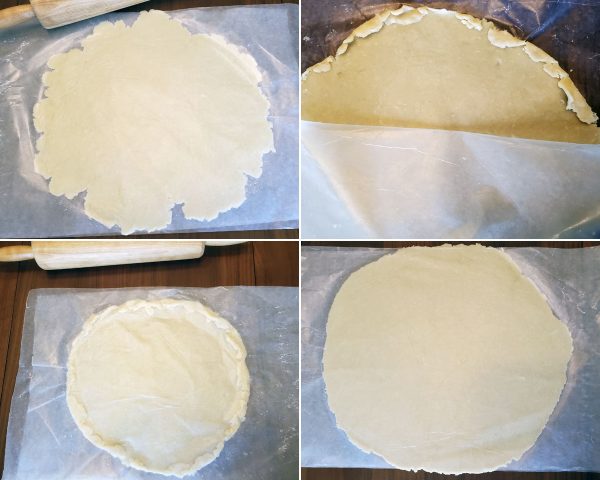
Pie crust tip – If you are rolling out your pie crust and it starts to look like an undiscovered continent (I think mine looks like the Land of Ooo), don’t despair. I have a simple trick for that. Roll it out to about the size you want. Then peel back the wax paper and curl the edges in. Replace the wax paper and use your rolling pin to smooth it out.
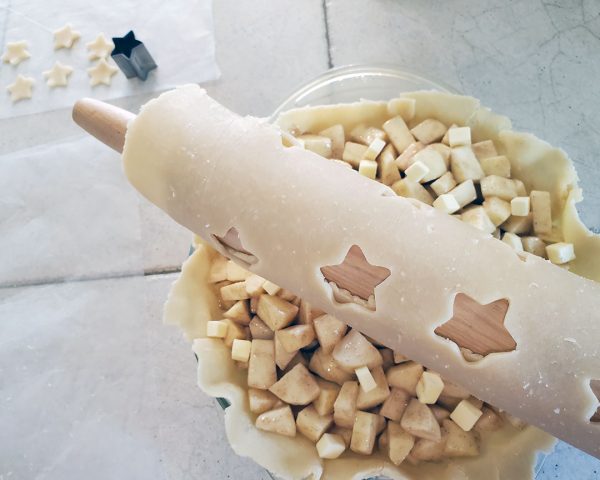
Crust decoration tip – When you are cutting pieces out of your crust, try not to get them too close together. This will make your crust very fragile and difficult to place over your pie. Gently roll your finished crust onto your rolling pin and transfer to your pie. Will it still rip? Mine definitely did. Fortunately, crust is easy to smoosh back together. Then use your crust cut-outs to cover the seam!
Baking tip – Fruit pies are juicy and I always bake mine on a cookie tray to catch leaks.
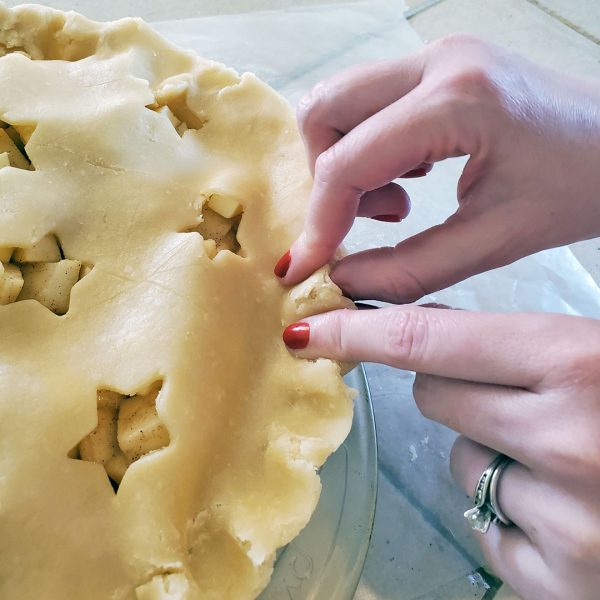
Rustic reminder – Homemade pies are not supposed to look perfect. Otherwise, they’d look store-bought! I like to crimp my edges simply with my fingers. Even with leaky juices and finger crimps, the pie turned out so deliciously kawaii!
If you try this, we would love to see your finished pie. Tag @sckawaii on Instagram.







Leave a Reply