
As promised, I am back with a Halloween update to my tutorial for how to make Animal Crossing felt frosted cookies.
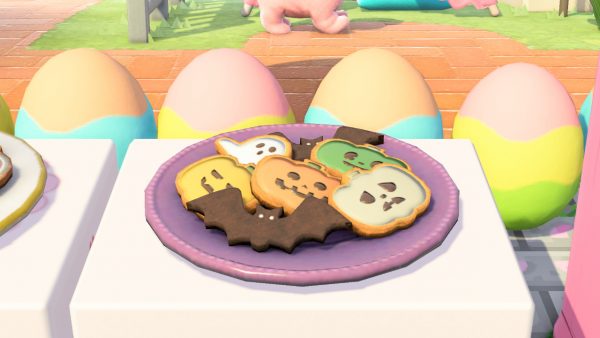
Spooky Cookies are now available in the game (one of your villagers should give you the recipe). I love them so much and now you can use my templates to make some for decorations, garlands or cards.
I’ve used card this time as it was faster but you can also use felt if you prefer (and I’ll include instructions for that at the end of the post), or even use the templates to make real cookies.
What you’ll need:

- Black, white, light brown, green, orange and light orange/yellow card (or use what you have)
- Scissors
- Glue stick
- Pencil/s
- Printable templates – download from Ko-Fi (and consider a donation to support SCK)
- Optional: string or yarn
Instructions
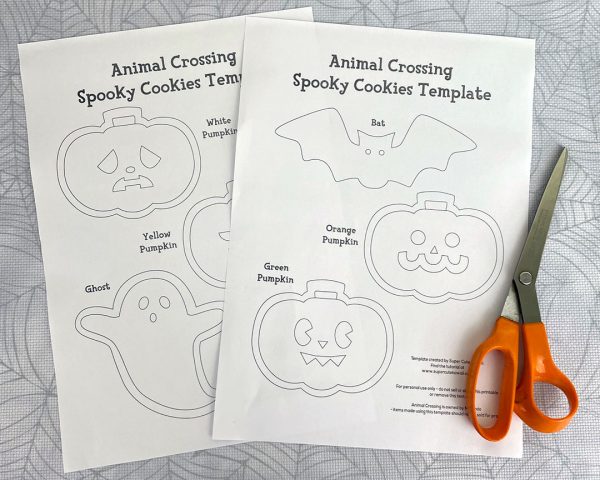
Download and print the templates – there’s 2 sheets with 6 characters. At 100% size the finished cookies will be around 10cm wide so adjust the scale if necessary. If you follow my instructions below, you only need one copy of each but if you want to keep all the templates and make this again, you’ll need 2 copies of each.
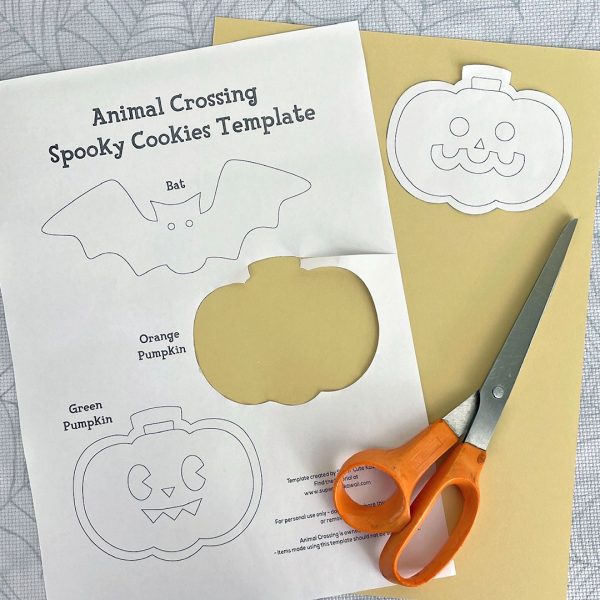
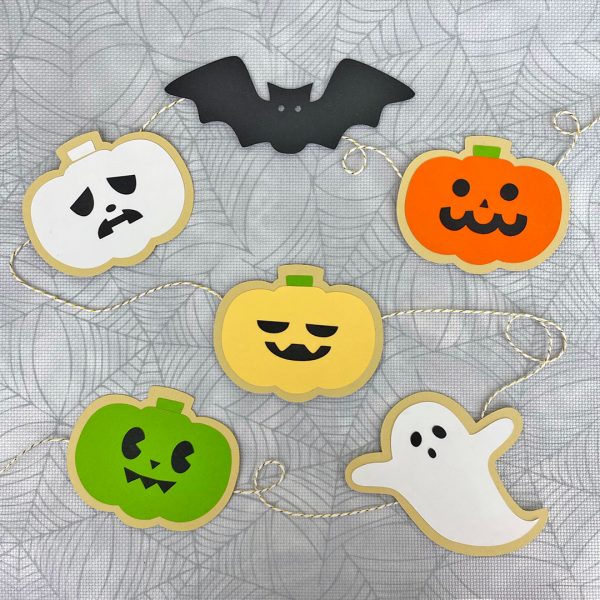
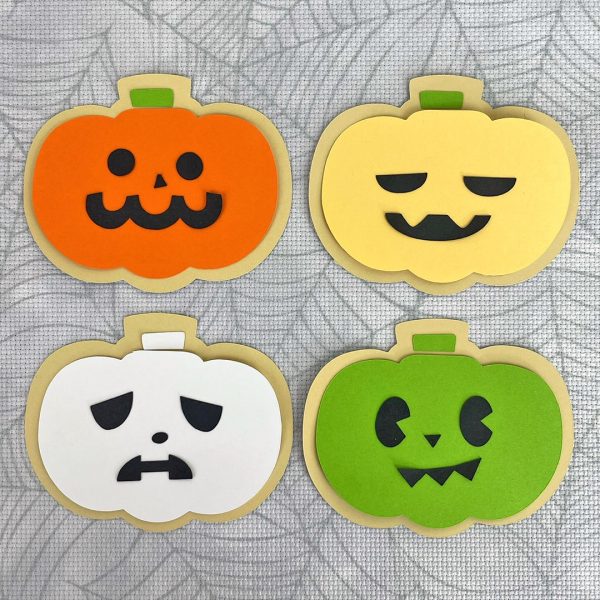
All the cookies are made in the same way so I’ll be showing you how to make the orange pumpkin from start to finish with a few tips for the others. Start by cutting out the full pumpkin from the template, then place it on the light brown card, draw around it with a pencil and cut it out. If you’re making all the pumpkins, cut out another 3 now before we make the template smaller.
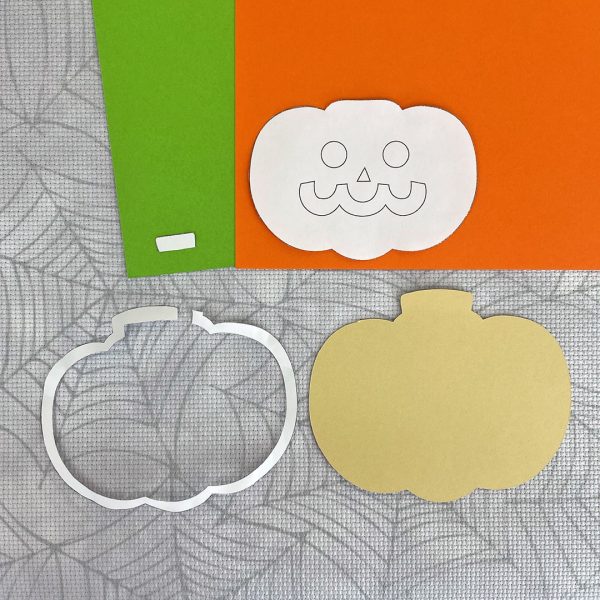
Cut the paper template down to the next line to get the 2 icing pieces. Draw around and cut a stalk from green and a pumpkin from orange. You’ll also need a white, green and light orange/yellow pumpkin, plus 2 more green stalks and 1 white stalk.

You can do the same for the faces, but it’s easier to just trace them straight onto the card – I’m using a soft 6B pencil and a hard 2H pencil but anything will work. Scribble over the face on the blank side of the template (I held it up to a window to give me a guide) then place this side down on your card and draw over the face lines, pressing hard. You should now have a face on the card to cut out. You can also just draw them on with a black marker pen if you prefer. Repeat this with the other pumpkin faces.
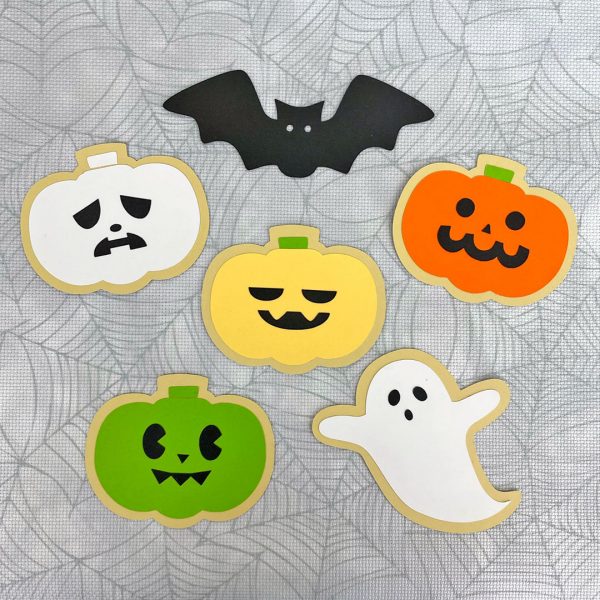
You should now have something like this! To get everything done in time for a tutorial, I cut mine with my Silhouette Cameo so don’t feel bad if yours aren’t so perfect. They’re supposed to be handmade cookies anyway so a little wonkiness is good.
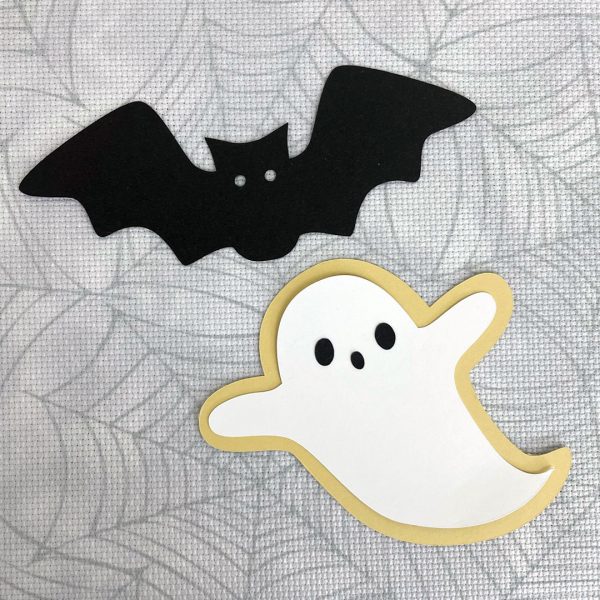
The Ghost is made in the same way with brown, white and black card and the Bat is just one layer of black card. I cut the eyes out for reasons (see below) but it would definitely be easier to draw them on with a white pen or a blob of correction fluid.
Use your glue stick to glue everything together, using the templates as a guide for the faces. You could even trace them again if you’re bad at eyeballing things. I really love how they turned out!
Making the cookies from felt
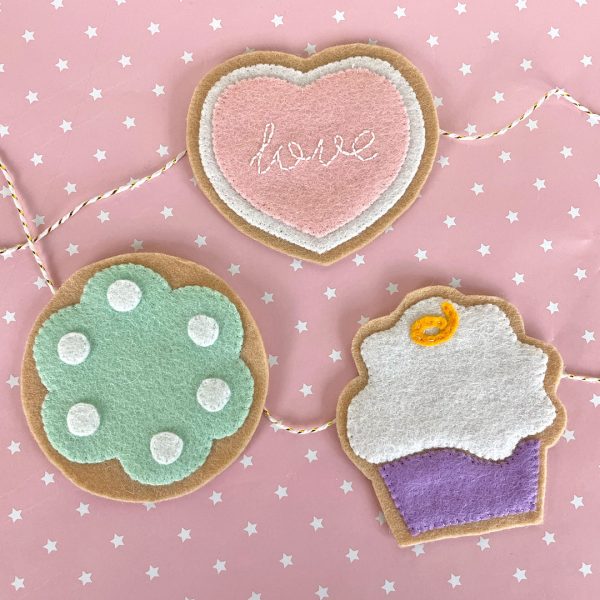
I haven’t done this yet but I hope I can find the time soon. I would make them in exactly the same way as my Felt Frosted Cookies Tutorial, which includes tips on sewing and cutting felt.
How to use your Spooky Cookies
Now you’ve got some finished cookies, there are loads of ways to use them. Here’s a few ideas:
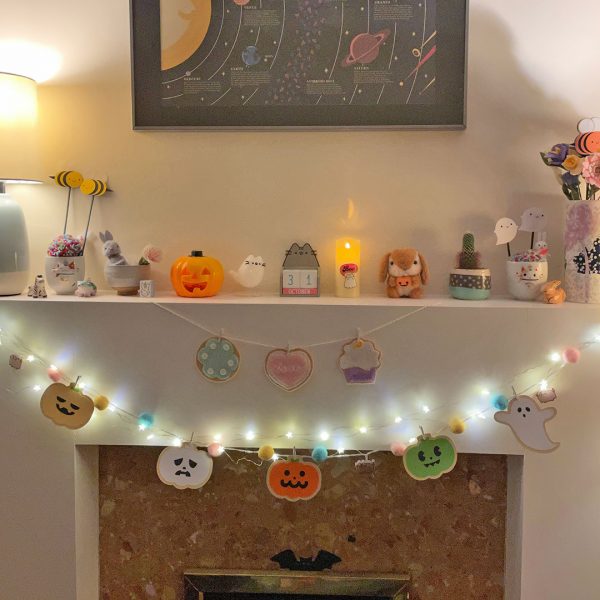
- Sew or tape a long piece of string to the back – or use small pegs – to create a garland
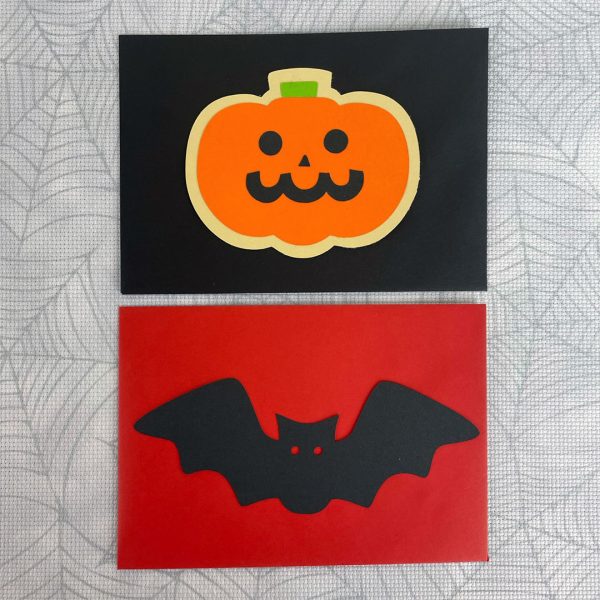
- Glue or attach to folded card to make Halloween cards
- Sew or tape a loop of string on the back for a hanging decoration
- Use as place cards for the dinner table
- Make them from felt in mini size and sew a brooch pin on the back
The ghost, bat and orange pumpkin are also part of the spooky garland item in Animal Crossing so you can make one of those in real life, or use the customisation options as inspiration for a different colour scheme. The pastel one would be so kawaii.
I hope you’ll try this out. If you do, we’d love to see – tag @sckawaii on Instagram.
This tutorial and the templates were created by Marceline for Super Cute Kawaii and the images, instructions and PDFs may not be reposted without credit and permission. Animal Crossing is owned by Nintendo and items made using this template should not be sold for profit.


Leave a Reply