
This is by Lulu, who’s on the shortlist to become one of SCK’s new writers. Have a read and tell us what you think!
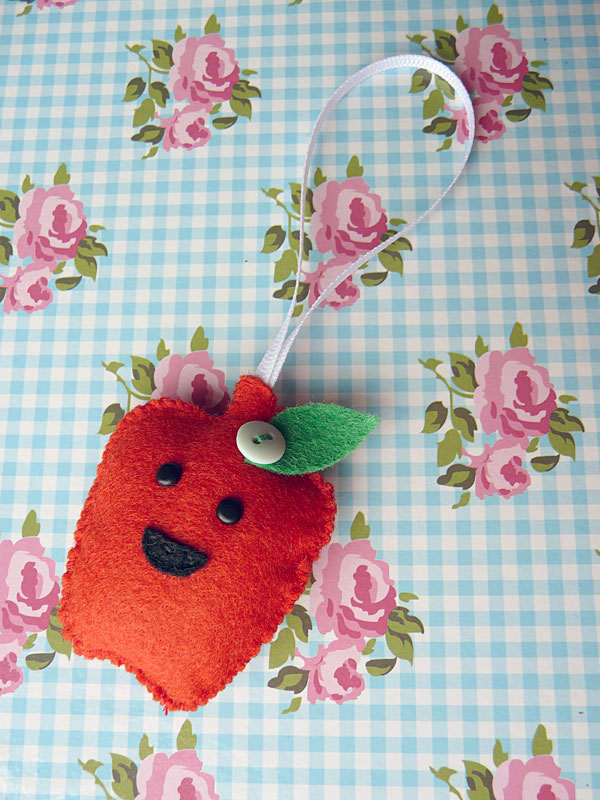
I love to sew, and today I’m going to show you how to make your very own Kawaii Happy Apple decoration from felt.
You will need:
- Red Felt (14 x 8cm)
- Green Felt (4 x 3cm)
- Black Felt (scrap)
- 2 Black Brads
- Ribbon (20cm)
- Small Button
- Stuffing
- Needle and thread
Template
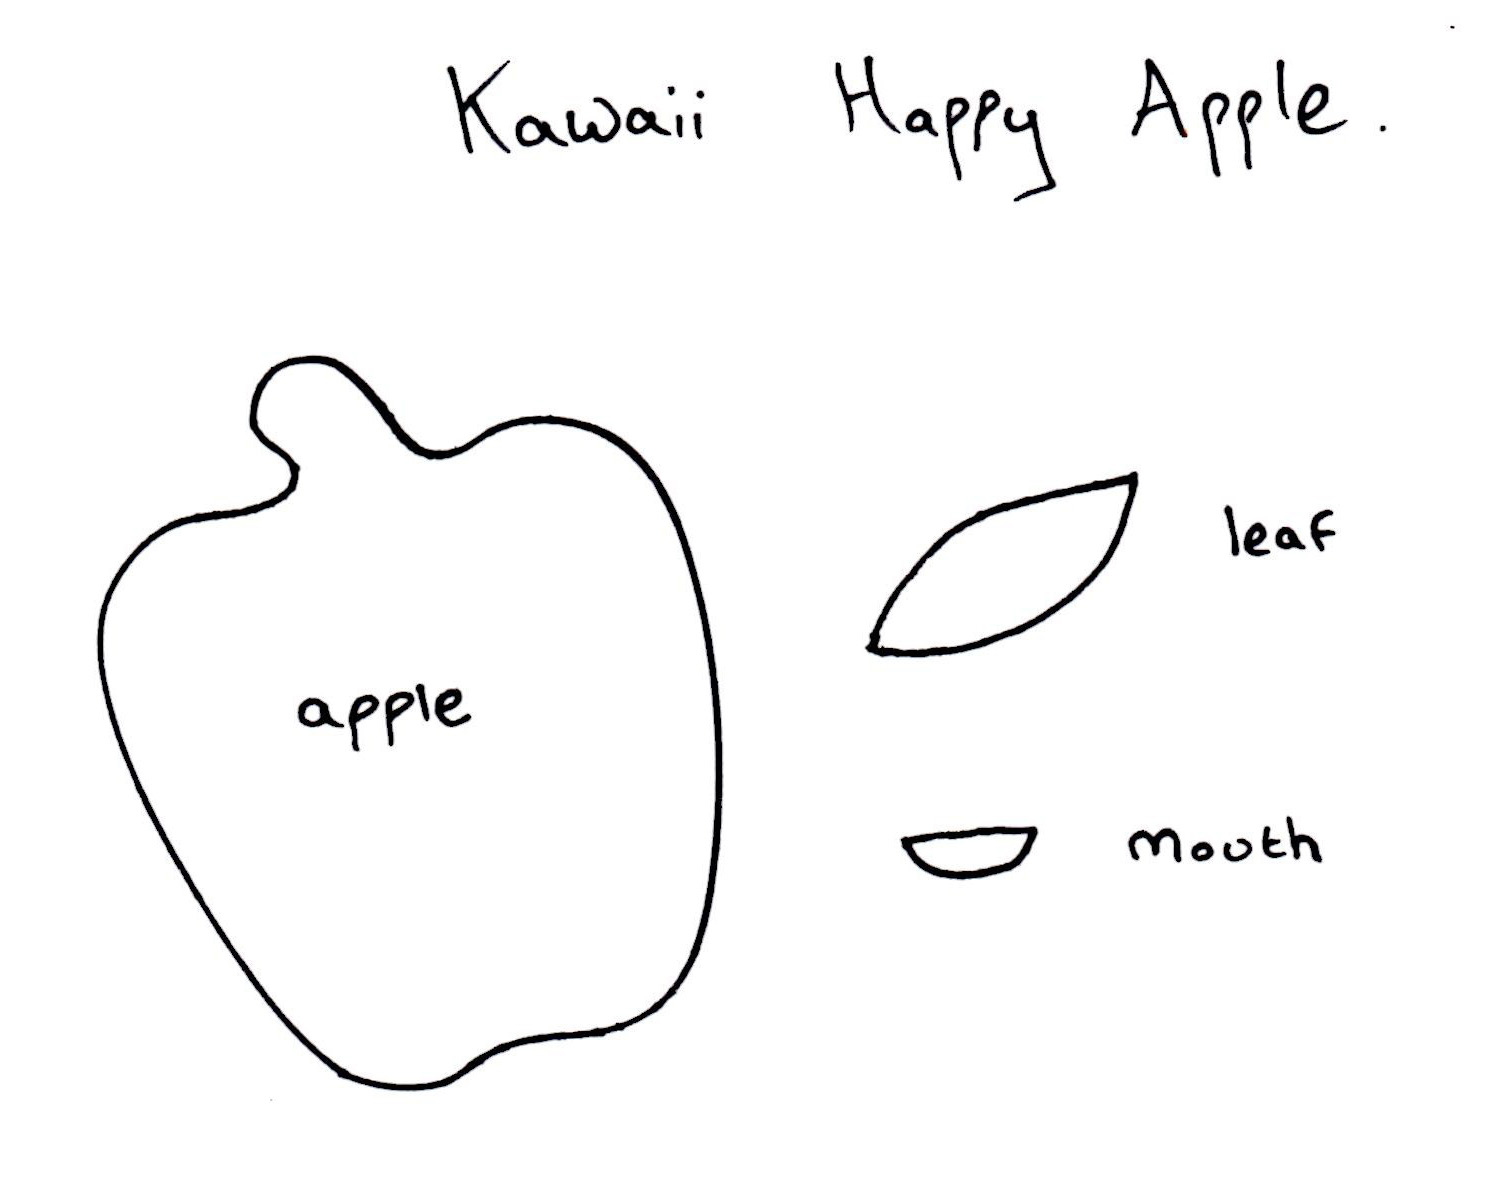
Step 1: Using the templates, cut 2 apple shapes out of red felt. Cut 1 leaf from green felt and 1 mouth from black felt.
Step 2: Take 1 red apple piece and decide where to position the eyes, mouth and leaf. When you are happy, push the brads through the felt and secure. Sew the mouth into position. Next sew the leaf onto the top of the apple using the button to fasten into place.
Step 3: Fold your ribbon in half to make a loop. Put the 2 ribbon ends between the tops of the 2 apple sides; sew into place. Make sure both sides of the apple are sewn together and the ribbon is secure.
Step 4: Sew around the edge of the apple, joining the 2 pieces together. Continue until 3-4cm from the end.
Step 5: Through the gap fill your apple with stuffing (not too full or it might burst!) then sew the gap closed. Secure thread, snip and voila – your very own Kawaii Happy Apple Decoration.
This tutorial was created for Super Cute Kawaii and the images, templates and instructions may not be reposted without credit and permission. Thank you for respecting the rights of artists and makers.
This is a guest post from a writer who is not currently part of the SCK Team. They might have been part of our search for new writers or a very special guest.


1 Comment
Tooka
October 16, 2014 at 3:38 pmA great make. Kawaii felt is always super cute :)