
If you like to journal away from home without bringing too many items, read on for an easy DIY that gives you a compact way to bring a variety of stationery!
I recently bought a small Delfonics utility pouch to store most of my core journaling supplies in, like my pens and cutting utensils. But how was I to store a variety of stickers, memo sheets, and sticky notes inside without stuffing the pouch and/or possibly damaging them? After a bit of brainstorming, it occurred to me that a 3-in-1 notebook was the best approach for my needs.
What you’ll need:
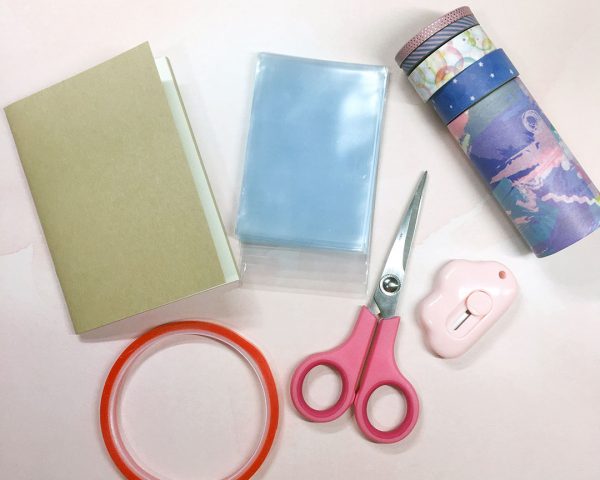
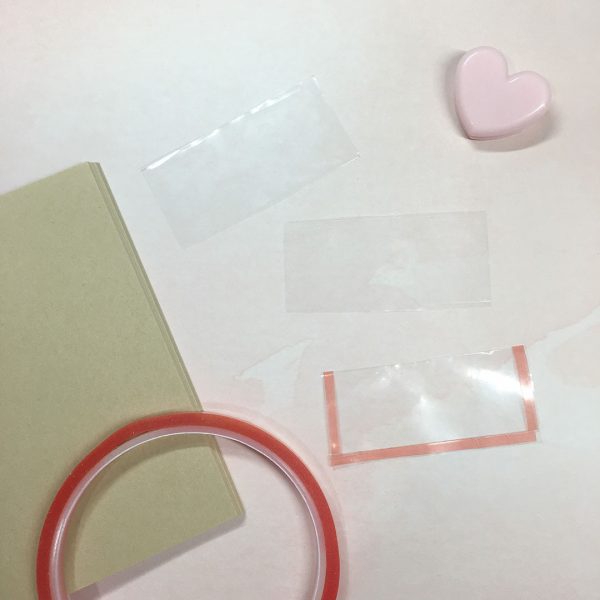
- notebook of choice – I used a Midori Passport-sized TN kraft paper refill (USA / UK)
- clear trading card sleeves
- 3mm double-sided permanent adhesive tape – I used 6mm and cut it down
- double-sided adhesive tabs (optional)
- pen knife or scissors
- assorted washi tapes (optional)
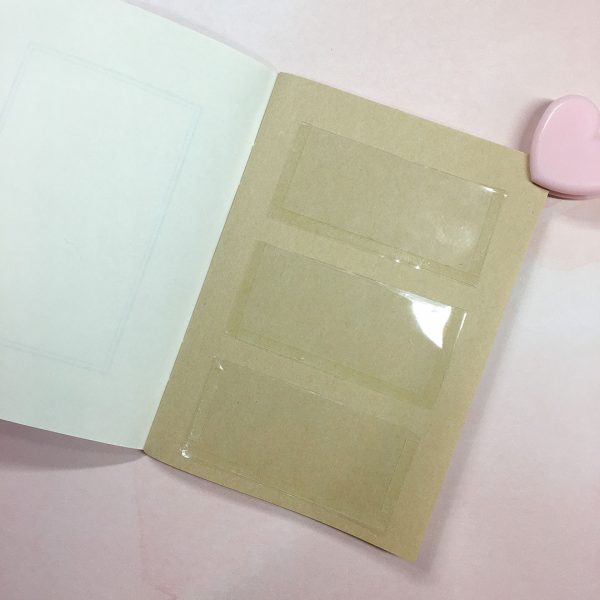
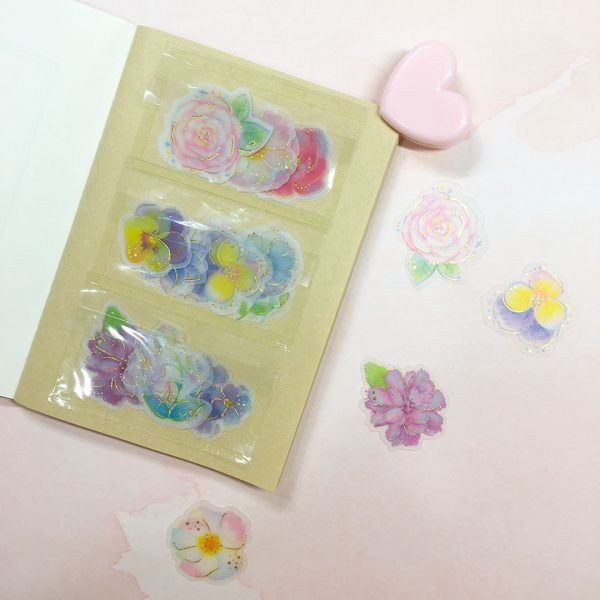
Storage for flake stickers
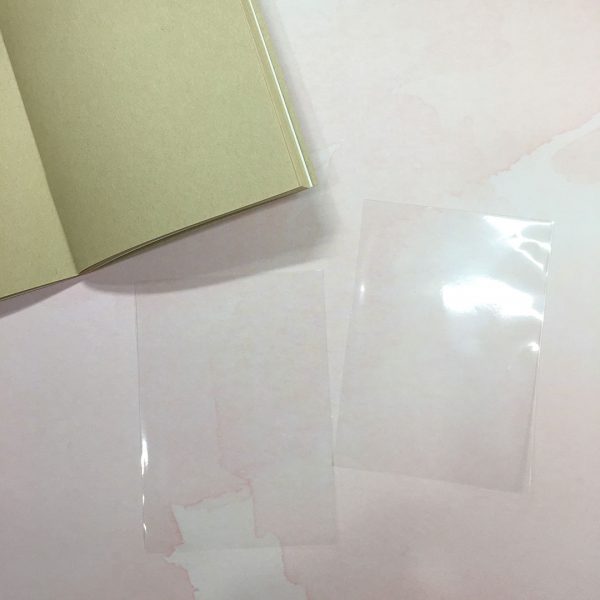
Start by cutting along all the seams of the sleeve with a pen knife or scissors so you have 2 separate sheets of plastic. Set one side.
The first sheet you will fold and crease into parts; each part will be one slot for stickers. That means you need to decide the size of stickers you’ll be storing. For smaller stickers, fold the sheet in quarters; for ‘medium’ stickers, fold the sheet in thirds; and for large stickers, fold the sheet in half. I created some of every size so that I have options!
Cut along the folds you just made. Now you should have 2, 3, or 4 single strips, depending on the number of folds you made. For the first sticker page (pictured), I folded the sheet into thirds, which meant I had 3 strips.
Adhere the double-sided tape to three sides of each strip, then stick them to the page so they’re evenly distributed.
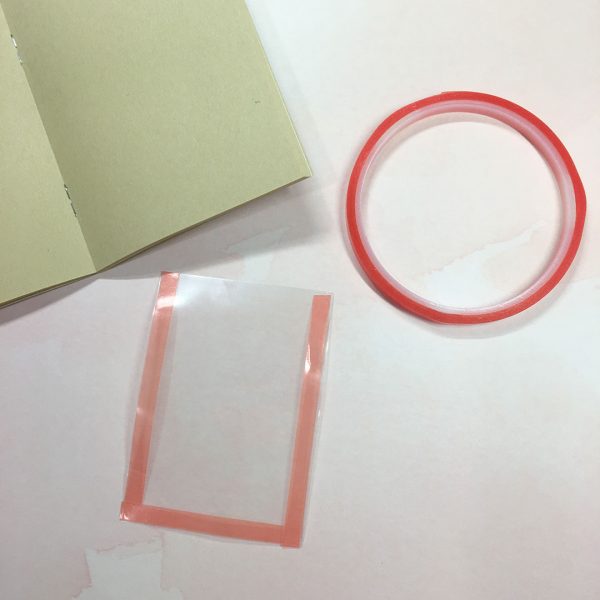
Now, follow the same steps on the second sheet that you set aside, but stop before adhering any tape.
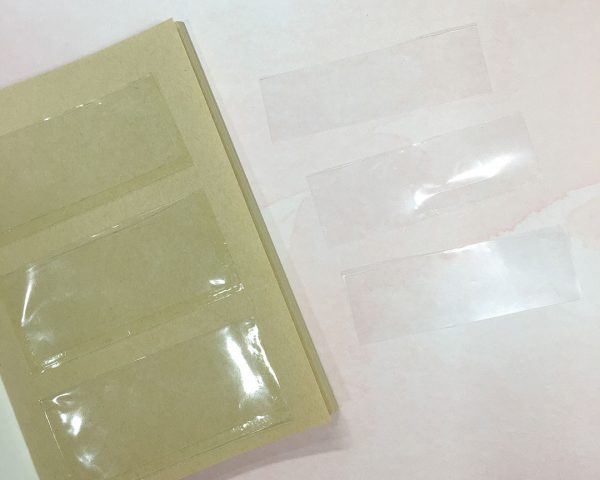
These strips will serve as cover flaps so that your sticker flakes don’t fall out, so you will only put one piece of tape along the length of the top side.
Do this with all remaining strips and place them above your sticker slots. Make sure to leave enough space at the top so that you can remove the stickers easily.
Storage for: memo sheets
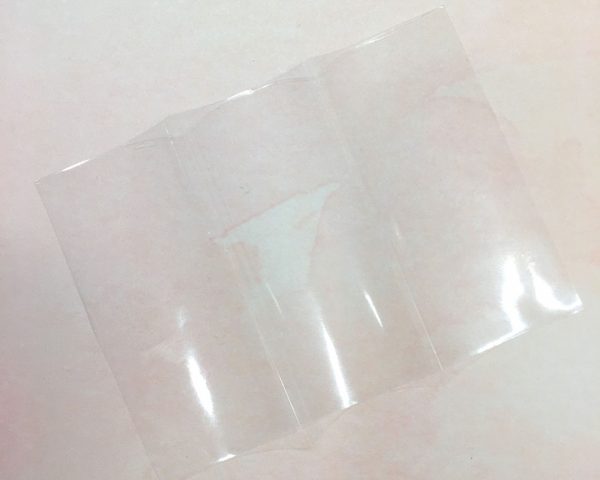
(Keep the sleeve whole for this!)
Decide on the size of memo sheet you will be fitting in the sleeve. If the memo sheets are shorter than the sleeve, using scissors or a pen knife to carefully cut about ¼ off the top (the open part) of the card sleeve. The goal is for the memo sheets to be longer than the sleeve to make them easy to get to.
On the back side, adhere double-sided tape to three sides. Peel the film off the tape and stick the sleeve to the page.
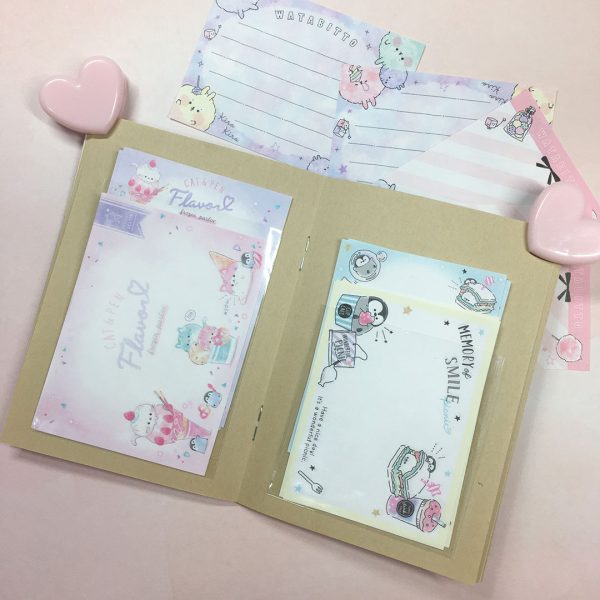
The sleeve on the left page is the original size, and the sleeve on the right page has been cut down for slightly smaller memo sheets. I own a lot of different memo sizes, so I find it helpful to varying sizes of sleeves.
Storage for: sticky notes
If you’d also like to take some sticky note samples with you on your travels as well, just use some more of the double-sided tape ) to position them on your pages—I switched to tabs that were less sticky so just so I could reposition them easier. Repositionable tape or tabs are ideal for this, so that you can move and change designs.

This part is rather straightforward, which makes a tutorial unnecessary, but I did want to share the idea!
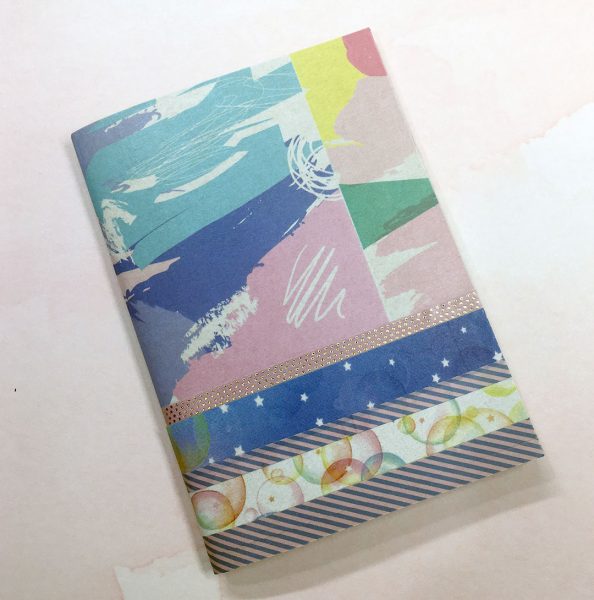
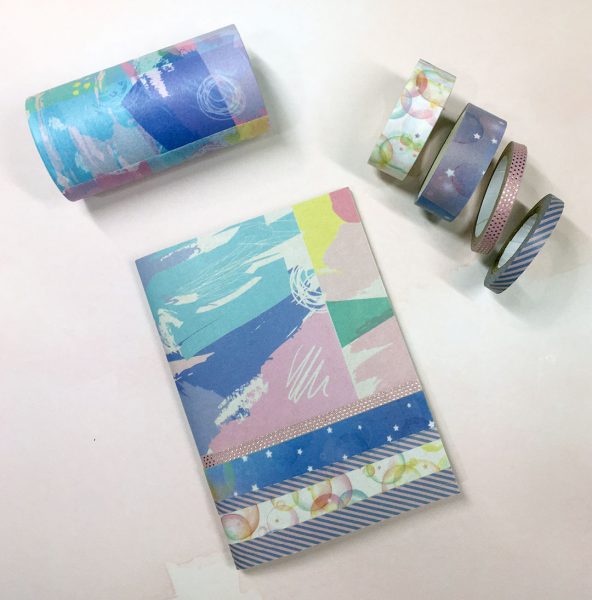
Decorating your journal
Of course, I couldn’t say my book was complete without decorating the cover. I chose to use some coordinating washi designs, but of course you can use whatever your heart desires.
Other ideas
The great thing about this DIY is that it’s totally customizable to your travel journaling needs! If you have printable label sheets or something similar lying around, the backing paper (with the waxy coating) can be cut to size and taped into pages so you can have a functioning sticker book and/or a place to stick washi samples you want to use later!
Please tag us on social media if you try out this DIY; we’d love to see your completed project! Also check out the Journaling & Planners section for more journaling projects like this one.


Leave a Reply