
Somehow October has flown by and I have managed to complete barely any crafts for the holiday, so I figured I’d force myself to sit down and make something cute, along with a tutorial.
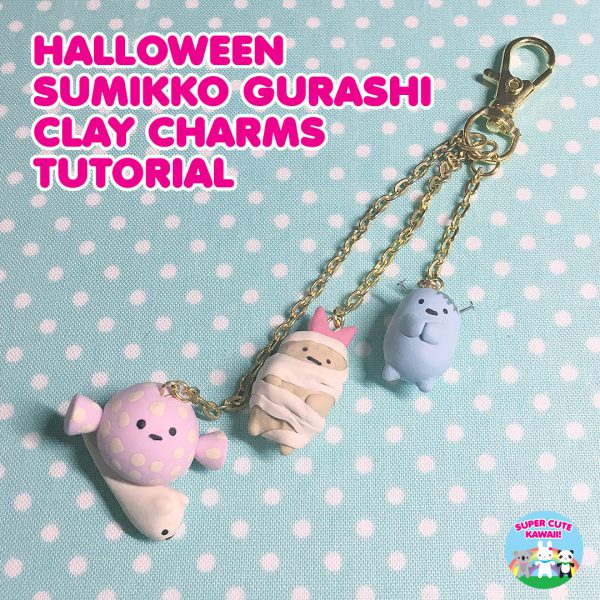
After seeing this Sumikko Gurashi art I knew exactly what I wanted to do! You can pick just one charm or make all of them, and each charm conveniently requires very few supplies.

What you need to make: Mummy Ebifurai no Shippo (Ebi Fry)
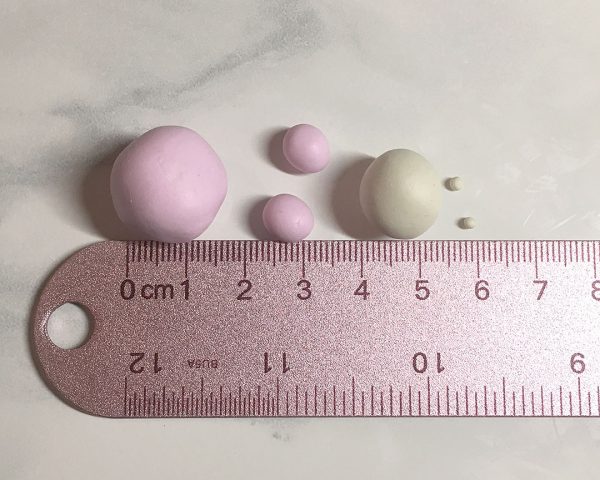
- Ecru clay (1x 1.25cm ball + 4x 2mm balls) / I used Premo Ecru
- Reddish pink clay (1x 5mm ball) / I used Sculpey Soufflé Guava
- Cream or white clay (1x 5mm ball) / I used Fimo Vanila
- Brown paint
- Eyepin
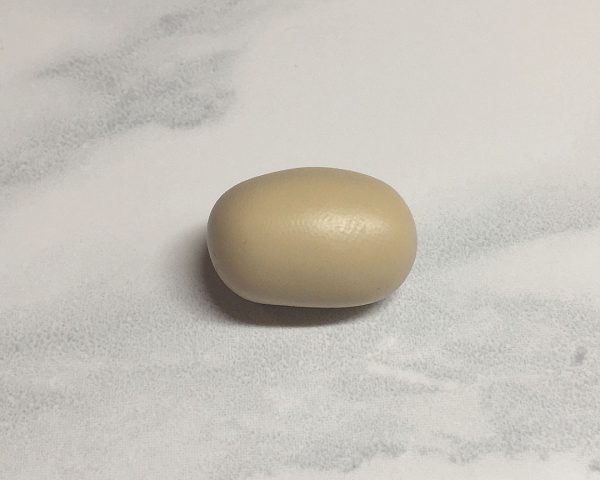
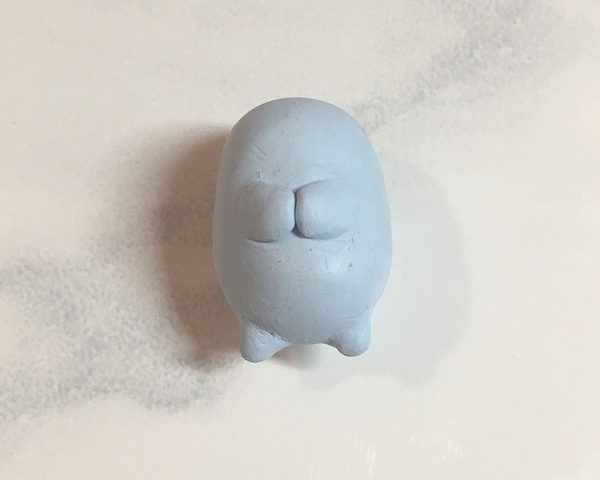
To make Ebifurai no Shippo, start by rolling your 1.25cm ball into a compact, slightly-jellybean-like shape.

Using your fingers or a blending tool, take 2 of the 2mm balls and blend them into the body to make the legs.
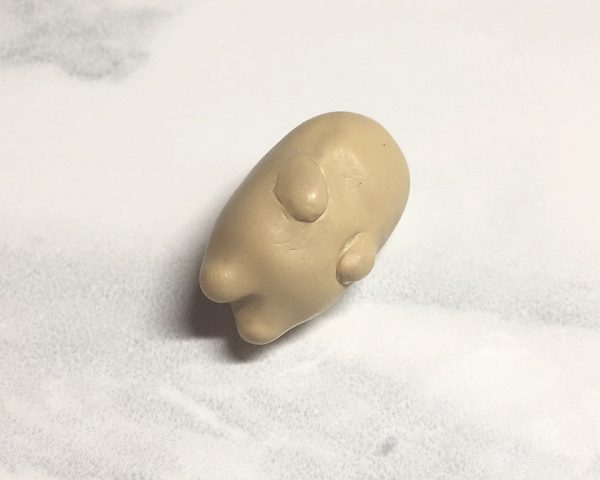
Then take the other two 2mm balls and roll them so that they’re slightly elongated. Place them on the front of the body spaced apart, and blend.
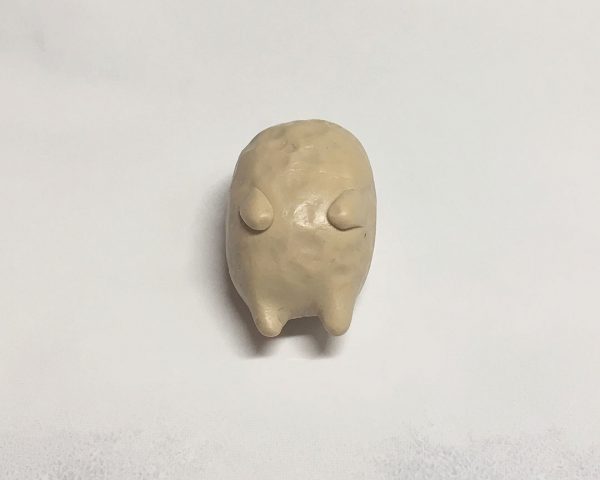
Once you’ve finished the body, take something with a round tip, like a paintbrush, and texture the body until it looks nicely fried. At this point it will look more like a chicken nugget with appendages….
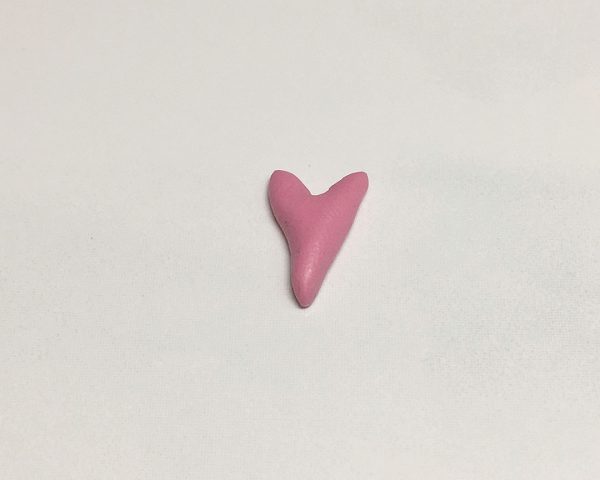
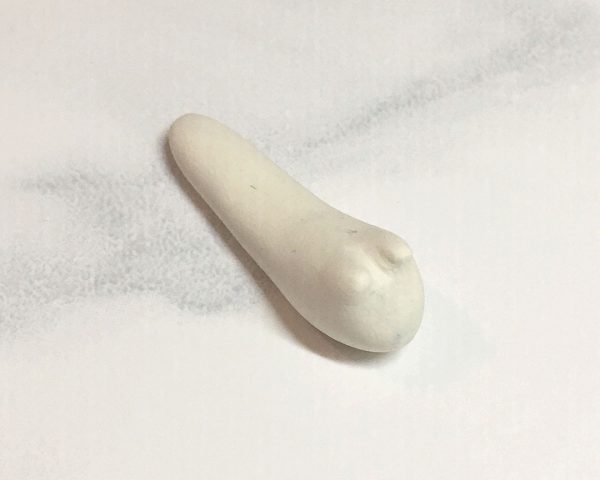
Now take the red/pink clay and roll it into a cone. Flatten it, then use an Xacto knife or something sharp to cut a split in the wide side. Shape it until you have something that resembles a shrimp tail!
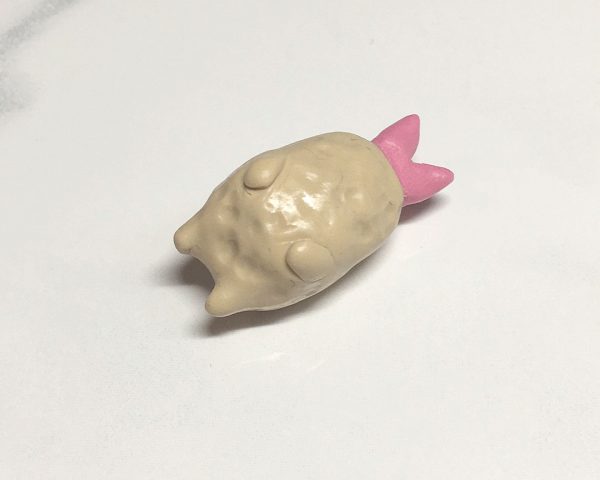
Place it on top of the head and blend it enough so it stays attached.
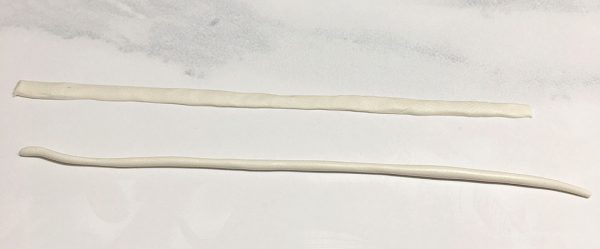
Now take your cream/white clay and roll it into a very thin snake. Flatten it completely, reform the edges as needed, then carefully wrap it around Ebi in a mummy-like fashion.
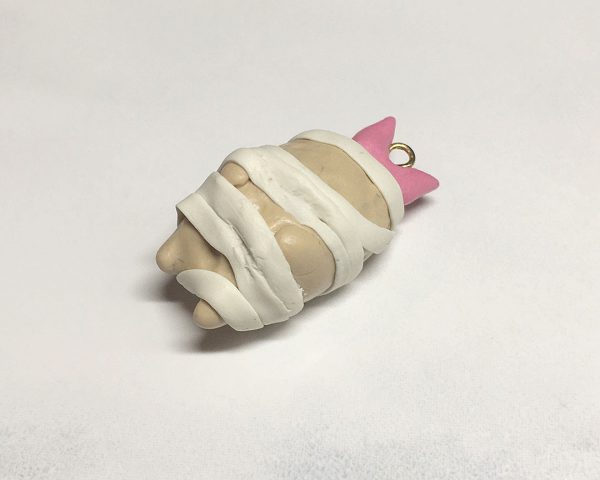
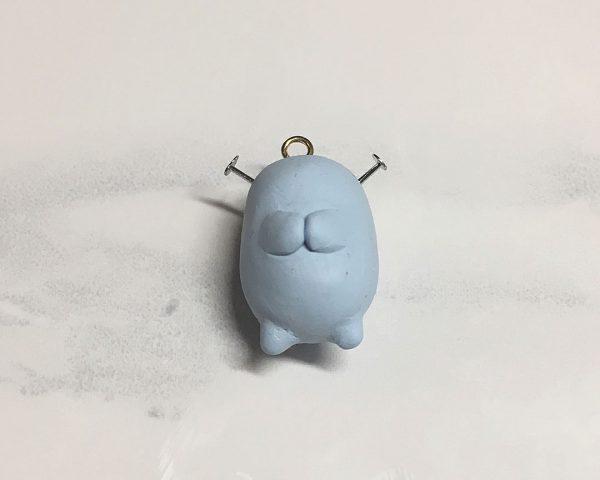
Finally, insert the eyepin in the tail to further secure it. (Pro tip: if you have dust issues like I did, dip a cotton bud in rubbing alcohol and clean your unbaked clay with it.) Bake using your clay package instructions. (Another pro tip: if you bake your clay and then notice dust, use acetone/nail polish remover to remove dust from baked clay!)
* * *

What you need to make: Frankenstein Blue Tapioca
- Blue clay (1x 1.5cm ball + 4x 2mm balls) / I used Sculpey Sky Blue
- Brown paint
- Silver paint
- 3x eyepins
The steps to make the Tapioca body are the exact same as Ebifurai except for the texturing. Follow the steps above and stop after blending the arms and legs.
Once you’ve finished the body, just trim two eyepins and insert them into the sides of the head for the Frankenstein bolts, then trim the last one and insert it at the top. Now bake using your clay package instructions!
* * *
What you need to make: Nisetsumuri (Snail)
- Cream clay (1x 1cm ball + 2x 2mm balls) / I used Fimo Vanilla
- Pink clay (1x 1.5cm ball + 2x 5mm balls) / I used Fimo Light Pink
- Brown paint
- Cream paint
- Eyepin
To make the body, take your large ball of cream clay and roll it into a small slug shape, with one end slightly thicker for the head. Take the two smaller balls and blend them into the top of the head for the ‘ears.’

Now take your large ball of pink clay and firmly press it onto the midsection of the slug. Shape the other two pink balls into fat cones and attach them to the large pink ball so it looks like a piece of candy. At this point you can blend them or trim your eyepins and use the excess wire to attach them, which is what I did.
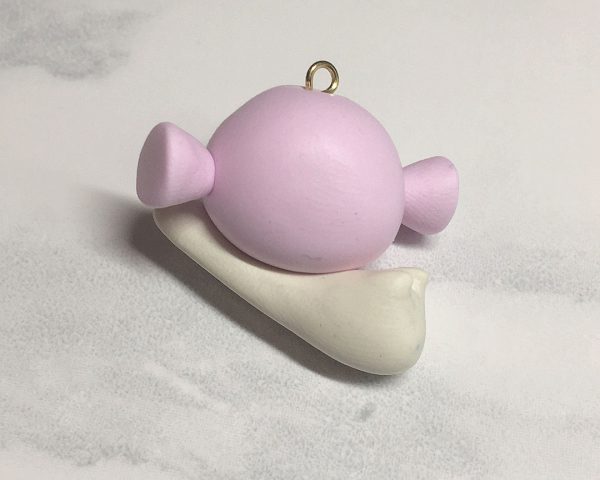
Insert the eyepin slightly off-center in the ‘shell,’ and bake using the package instructions.
Finishing Your Sumikko Gurashi Clay Charms
I forgot to take pictures of the painting process (whoops!) but it’s very, very simple. All charms use brown paint for the face—literally 2 small dots for the eyes and 1 short, fine line for the expressionless mouth. Use silver paint to make the Frankenstein scar on Tapioca’s forehead, and cream paint for the dots on Nisetsumuri’s shell. I used a dotting tool, but you could use many things for this step: a toothpick, sewing needle or pin, or a paint brush meant for very fine details.
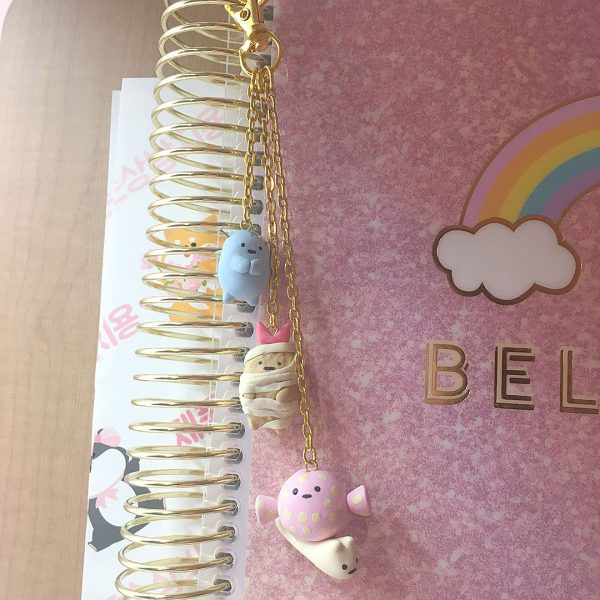
Now you have a new set of spooky-cute Halloween Sumikko Gurashi charms to use for jewelry, keychains, bag charms – or planner charms, which is what I chose to use them for!
You can find all the SCK Original DIYs and more Halloween Crafts in our archives. Let us know if you make something!
This tutorial was created by Andi for Super Cute Kawaii and the images and instructions may not be reposted without credit and permission. Thank you for respecting the rights of artists and makers.


Leave a Reply