
If you’re looking for a cute Easter time DIY, look no further! This tutorial is mostly a no-sew project, so it’s a simple and relatively quick DIY.

It turned out extra adorable thanks to the supplies that I recently featured in my Kawaii Fabric review. Be sure to check out the review for more about the supplies used and other useful inspiration for kawaii crafting!
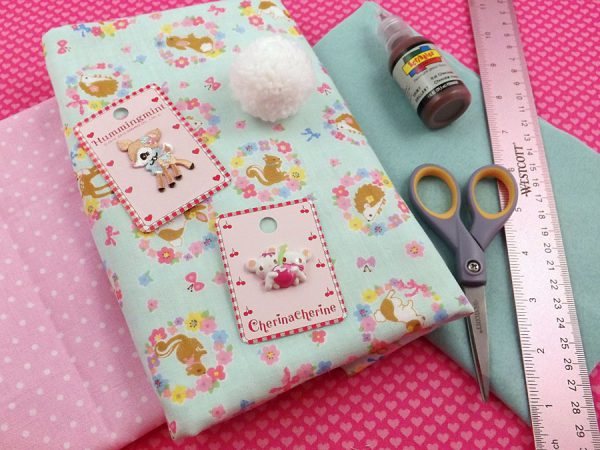
What you’ll need
- 2 coordinating fabrics
- felt
- elastic cord
- a button (used here: CherinaCherine button)
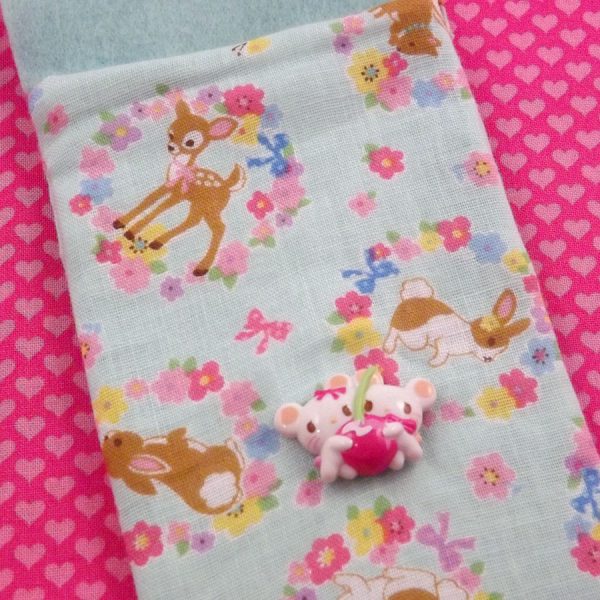
- decorations of choice (used here: Hummingmint stick-on patch)
- ruler
- scissors
- straight pins
- needle & sewing thread
- hot glue or fabric glue
- pom-pom (optional)
Instructions
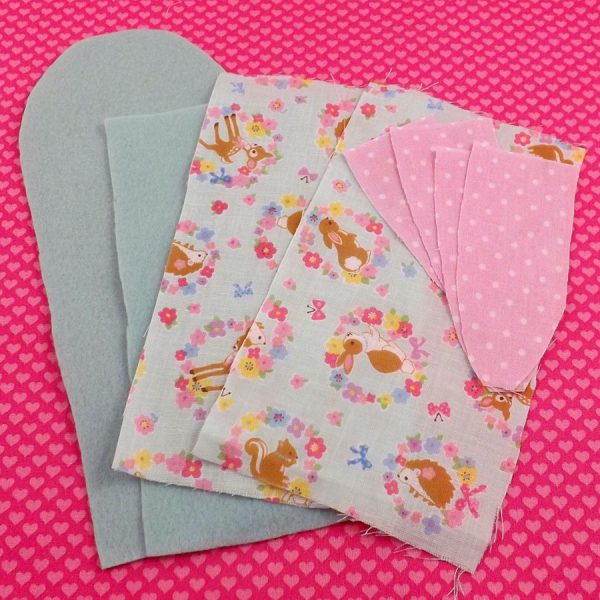
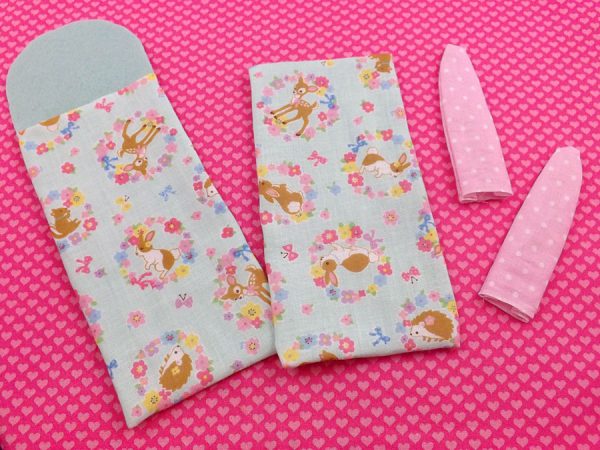
From your main fabric, measure and cut out: two 19cm x 10cm rectangles. From your felt, measure and cut out: one 25cm x 8cm rectangle and one 17cm x 8cm rectangle.
Take the 26 cm felt strip, fold it long ways along the center, and cut the corner on one side so that it has two rounded corners when unfolded.
For the bunny ears, measure and cut out four 11cm x 5cm rectangles. Draw a bunny ear with chalk or a pencil on a single rectangle. Pin together all 4 rectangles and cut along your outline. There should now be four ears.
Now on to assembly!
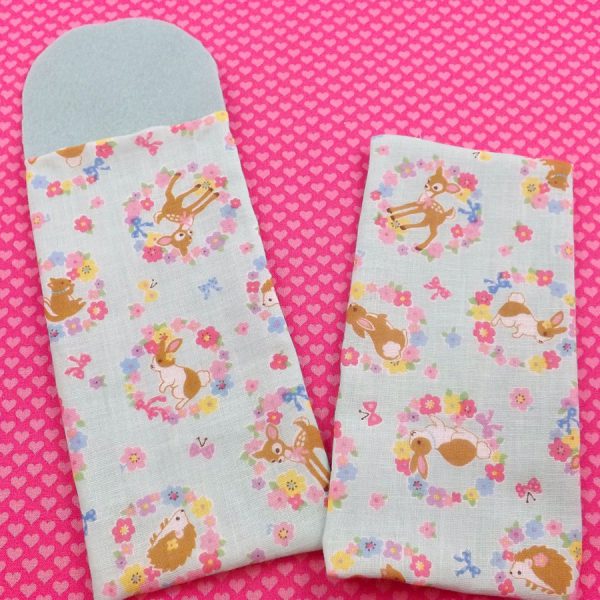
Lay one 19 cm rectangle so that the wrong side is facing up, and center the smaller felt rectangle on top of it. Place glue along the edges of the felt and fold in the excess fabric. Repeat with the second set of fabric pieces. Leave the “pocket” with the raw edge open on the outer part of the back half. At this point you should have something that looks like this:
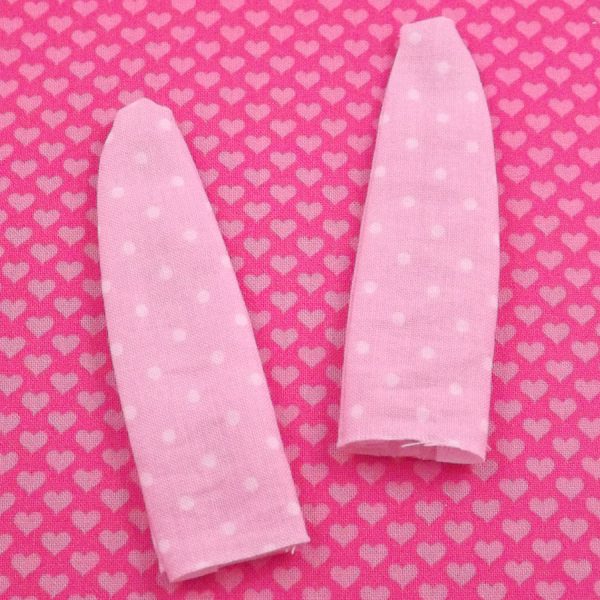
Take two ear cut-outs and place the right sides together. Starting 1 cm from the edge, sew along the shape using a simple running stitch until you reach the other side of the ear. Repeat this with the last 2 ear cut-outs, and then turn them inside out until the right sides are showing.
Since the ears are smaller pieces of fabric, I chose to sew them together to avoid making a mess with glue. For a completely no-sew version, you will follow the same 1 cm allowance and place an outline of glue on the right side of one ear cut-out, then place another (right side down) on top of it. Then turn it inside out until the right sides are showing.
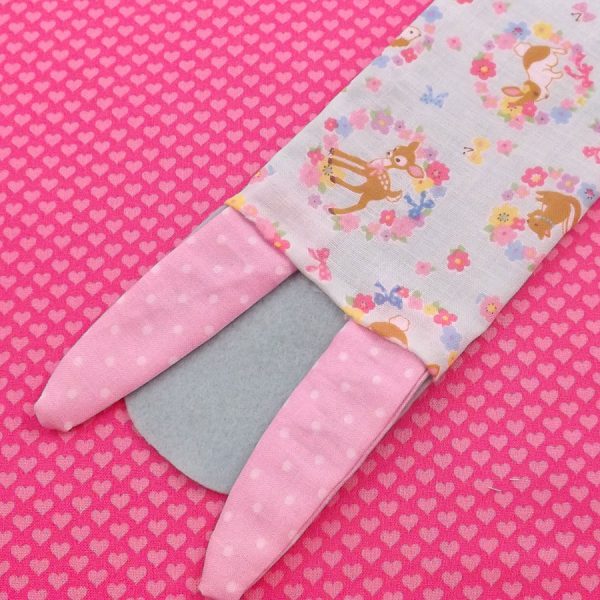
There should now be two ears, a front half, and a back half (still with an opening)!
Now glue the ears down inside the pocket that was left open on the back half, about 1.5 cm below the edge. Fold in the raw edge and glue everything down. Both ears should now be secured, and there should be a clean, sealed seam.
Almost finished! For the closure, use some thread and sew the button in the center of the front half. Mine ended up looking best about 9 cm from the top.
Then glue the front and back halves together. If you take your time and glue in sections, it’s fairly easy to mimic the look of tightly sewn seams.
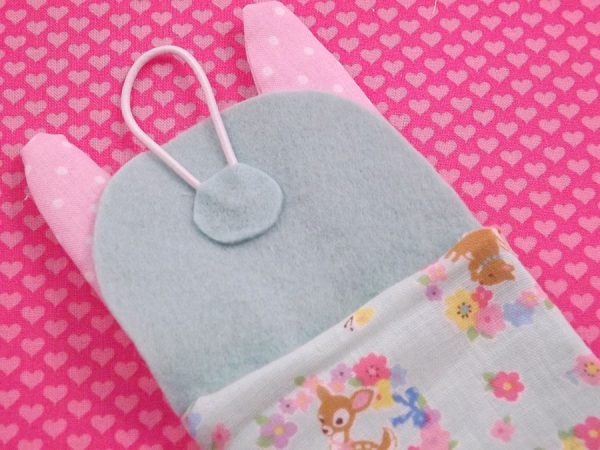
Loop the elastic around the button and bring to the inside of the bunny’s “head.” Make sure it’s not too tight or too loose, and glue it down. I chose to cover the ends with a felt circle for a cleaner look. (Pro tip: use a hair elastic cut in half!)
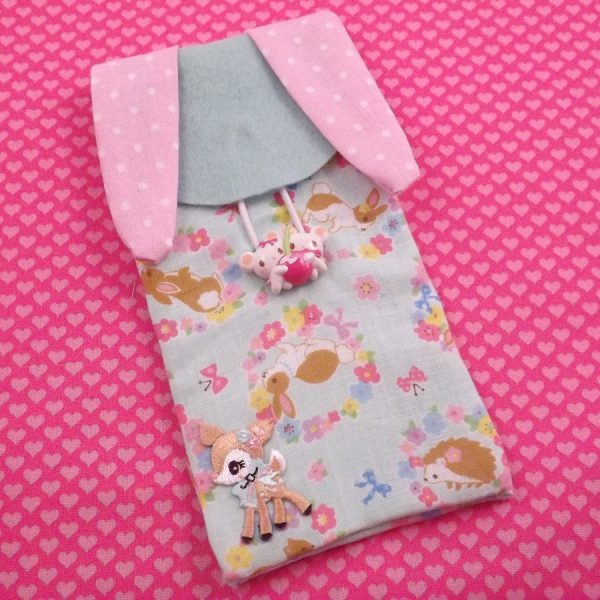
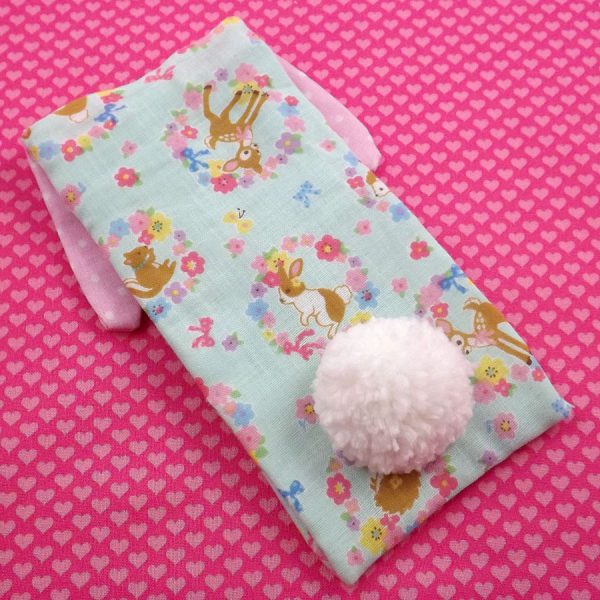
Now add whatever deco your heart desires! I added the Hummingmint patch since it so cutely matched the fabric print, and a pom-pom for the bunny’s big fluffy tail.
Don’t forget the face. :)
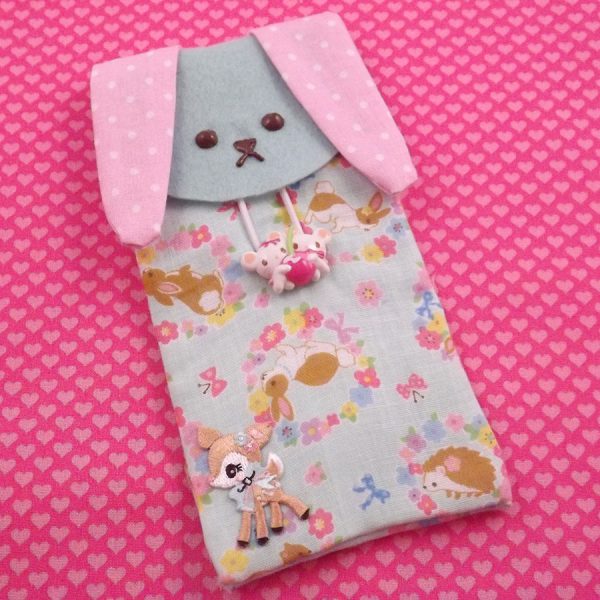
I chose to use puffy paint for a change, but a face using felt or embroidery would be super cute too.
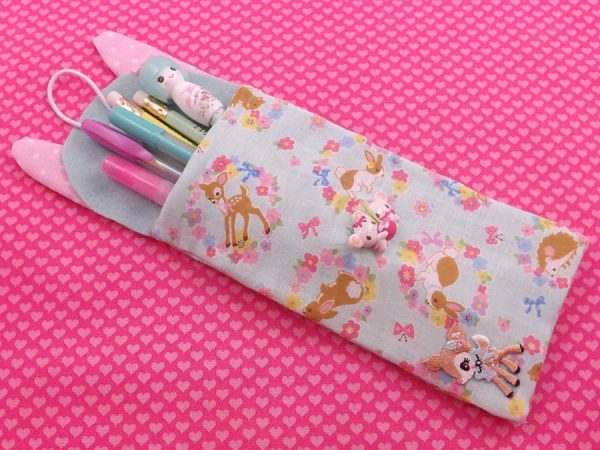
Tada! Now you have an adorable bunny pencil case just in time for Easter. I really enjoyed making this DIY, and I hope SCK readers do too! If you make one tag @sckawaii on Instagram or Twitter so we can see.
If you decide to try this out, comment below or tag @sckawaii on social media – we’d love to see your creations! You can also check out all of SCK’s original tutorials for more crafty ideas.
This tutorial was created by Andi for Super Cute Kawaii and the images and instructions may not be reposted without credit and permission. Thank you for respecting the rights of artists and makers. (Fabric and notions provided by Kawaii Fabric but all words and photos are my own.)
Andi lives in the countryside of Georgia in a house packed with kawaii decor and vintage toys. When she’s not barricaded in her pink craft room creating something, she can be found reading, playing Animal Crossing games, or baking something to satisfy her massive sweet tooth. Andi is currently taking a mental health break, but hopes to be back in 2023.

No Comments